Managing Labs
This page covers everything you can do with a lab once it exists: the labs list, the lab detail page, retrying or recreating a lab, adding templates, editing lifecycle policies, and lab credentials. See Creating a Lab for the creation wizard itself.
Manage your labs
Clicking on the Labs button in the header will redirect you to the labs list page. The Provider dropdown is available on every admin page and navigates directly to the OVH or Azure configuration page.
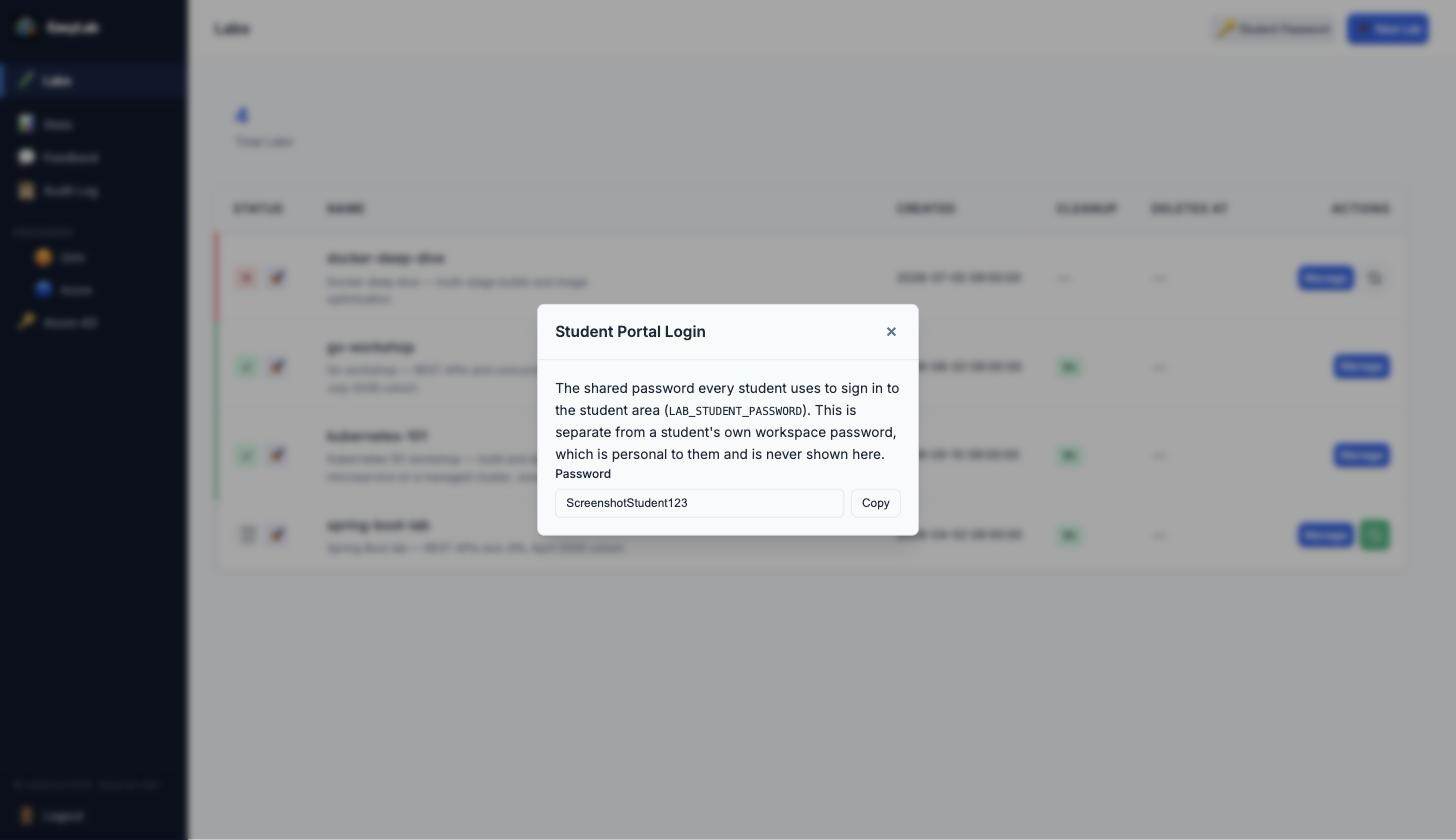
The page header also has a Student Password button, next to New Lab. Click it
to reveal the shared password students use to sign in to the student area (set via the
LAB_STUDENT_PASSWORD environment variable — see Docker configuration),
with a Copy button alongside — handy if you're administering EasyLab without shell
or deployment access and don't want to track down whoever set that variable. This is
the password students type on /student/login to reach the student portal; it has
nothing to do with, and is never the same as, an individual student's own workspace
(code-server) password, which is personal to that student and generated per-workspace
— EasyLab never exposes a student's workspace password through the admin UI. If
LAB_STUDENT_PASSWORD isn't set, the dialog says so — classic student login is
disabled in that case, and students can only sign in via Azure AD if it's configured
(see Azure AD authentication).
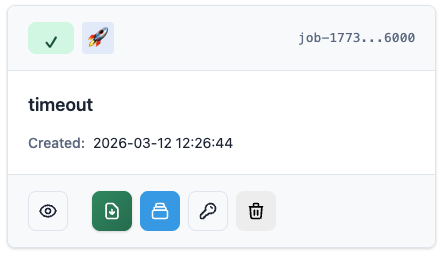
The table shows, per lab:
- Status — created, running, completed, failed, destroyed, or dry-run-completed (preview-only)
- Name — the stack name and description you gave it when creating it, with a dashed Closed badge when the lab is closed to new students
- Creation date
- Cleanup — the workspace lifetime policy (i.e. after how many hours/days the workspaces will be deleted)
- Deletes at — the lab's scheduled auto-destroy date, if one is set
The list is paginated at 25 labs per page once you have more than that; use the Previous/Next buttons at the bottom of the table to navigate.
Every row's Actions column has a single Manage button that opens the lab's own detail page — everything you can do with a lab lives there now. The one exception is a status-contextual quick action next to Manage: a Retry button on a failed lab, or a Recreate button on a destroyed one, so you can act on several labs from the list without opening each one individually. Both open the same retry/recreate choice the detail page's Danger Zone offers.
The lab detail page
Clicking Manage on any lab opens /labs/{id} — one page with everything about that
lab, organized into tabs at the top:
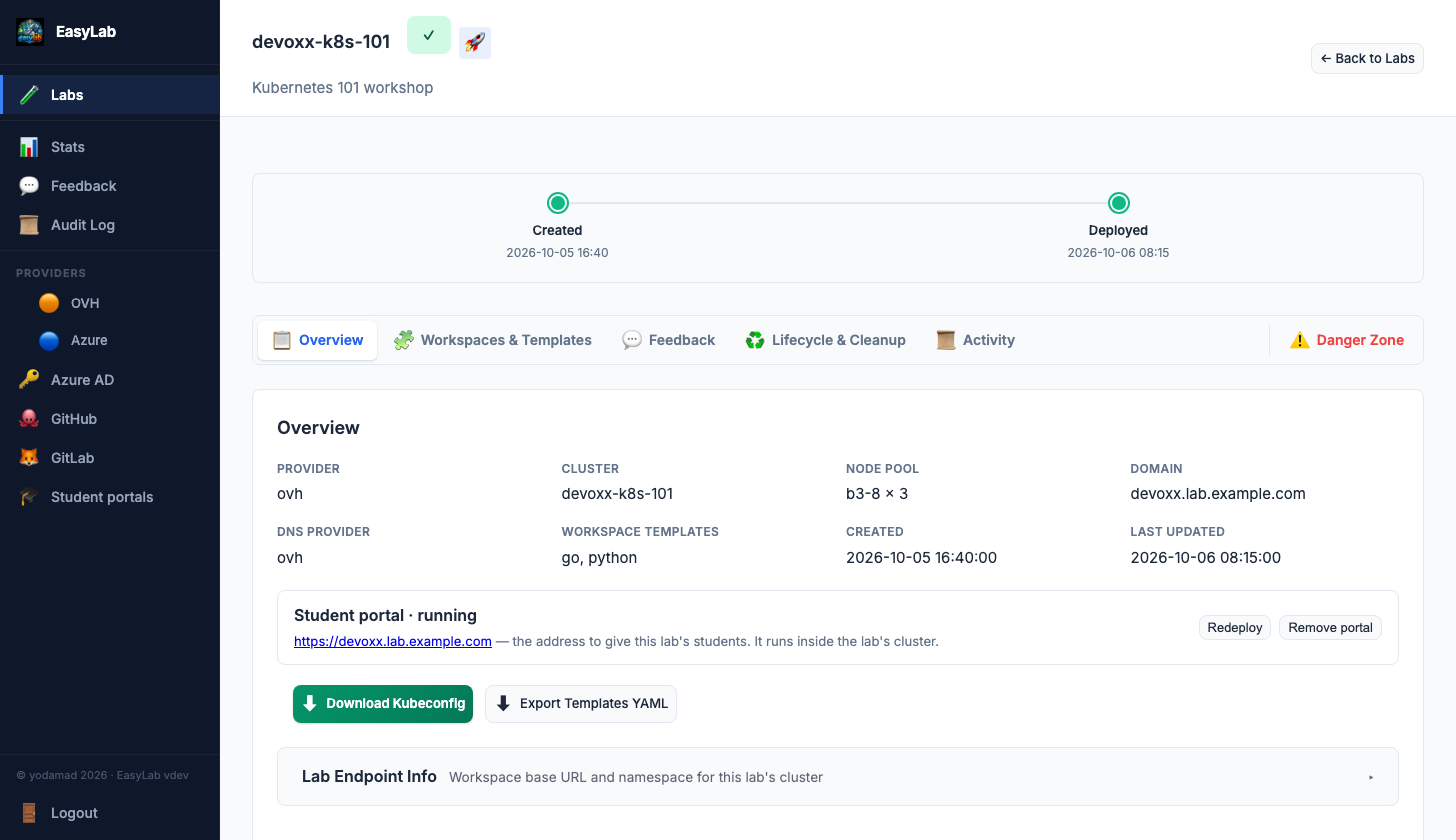
- Overview — provider, cluster, node pool, domain, DNS provider, and configured workspace templates at a glance; the Download Kubeconfig and Export Templates YAML actions; and, once the lab is completed, an inline Lab Endpoint Info panel with the workspace base URL and namespace (this replaces the old read-only modal). Once the lab is completed it also shows the lab's student portal. A small lifecycle strip under the page header plots the lab's timeline — created, deployed, each automatic cleanup sweep, and its scheduled or actual destruction — using the same data as the Lifecycle & Cleanup section below.
- Progress — shown only while a lab is pending, running, failed, or a completed dry run; this is the same live-updating deployment log the creation wizard shows, embedded here instead of on a separate page. The panel refreshes every 10 seconds while the deployment is in flight and follows the newest log lines, unless you scroll up — then it stays where you left it so you can read. When a deployment you are watching finishes, the page reloads itself so the Workspaces & Templates tab appears.
- Workspaces & Templates — shown once the lab is completed; this absorbs everything that used to live on the standalone View Workspaces page: the Credentials panel, the Templates on this lab panel (with Bake image/Rebuild and Remove), the Add Template drawer, and the Active Workspaces/History tabs. See Templates on a lab and the sections after it below — the content is unchanged, only where you reach it moved.
- Feedback — a compact summary (average rating, most recent comments) with a link to the full feedback page for this lab.
- Lifecycle & Cleanup — an inline form for the workspace lifetime and lab deletion date/time (this replaces the old Edit Lifecycle modal), plus a history table of every automatic cleanup sweep that has run.
- Activity — this lab's entries from the audit log, filtered to just this lab.
- Danger Zone — Retry, Recreate, Destroy Stack, and Remove Lab, status-gated the same way they always were, now grouped together and visually set apart rather than mixed in with everything else.
The old /labs/{id}/workspaces URL still works — it redirects into this page's
Workspaces & Templates section.
Student portal
A completed lab's Overview tab has a Student portal strip. It manages the in-lab student portal: a student space dedicated to this lab, running in the lab's own cluster.
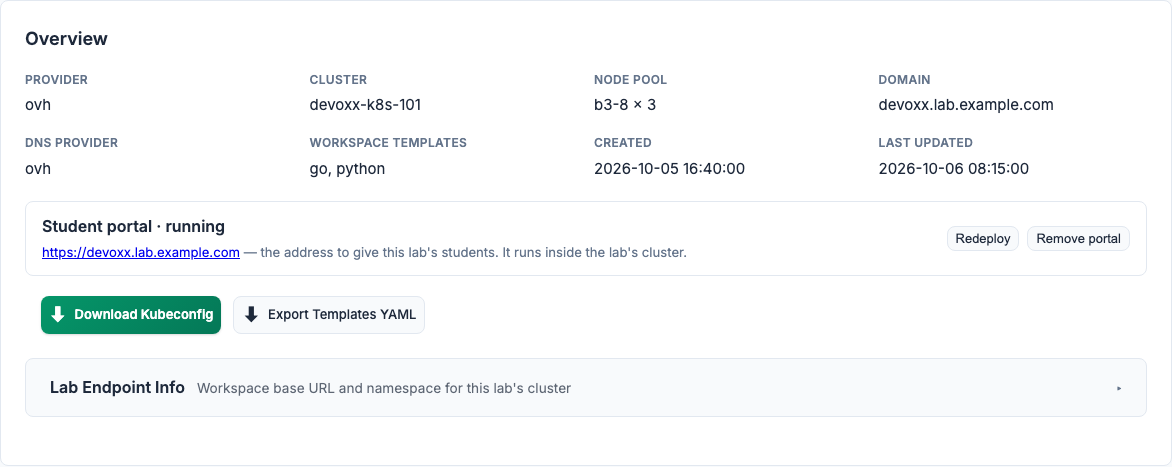
- No dedicated student portal — the lab's students use the central student space. Click Deploy student portal to give the lab its own. The button waits for the deployment and reports its outcome.
- Student portal · running (or starting) — the strip shows the portal's address, which is the one to give this lab's students. Redeploy runs the deployment again (for instance after fixing what made it fail); Remove portal deletes it from the cluster and sends the lab's students back to the central student space. Whatever the portal still had to report — workspaces created, feedback — is collected first.
If the deployment failed, the reason is shown under the strip (Student Portal Not Deployed), and EasyLab retries on its own every few minutes. The strip also tells you when the portal can only offer password sign-in because this instance's public address is not set, with a link to the Student portals page where you set it.
You never have to push changes to the portal: closing a template, adding one, editing the lifecycle and so on reach it within seconds, and what students do there shows up in this page's Workspaces, Feedback and Activity tabs.
Retry or recreate a lab
Clicking Retry on a failed lab, or Recreate on a destroyed one — from the list's quick-action button or from the detail page's Danger Zone — first asks you to choose between two options:
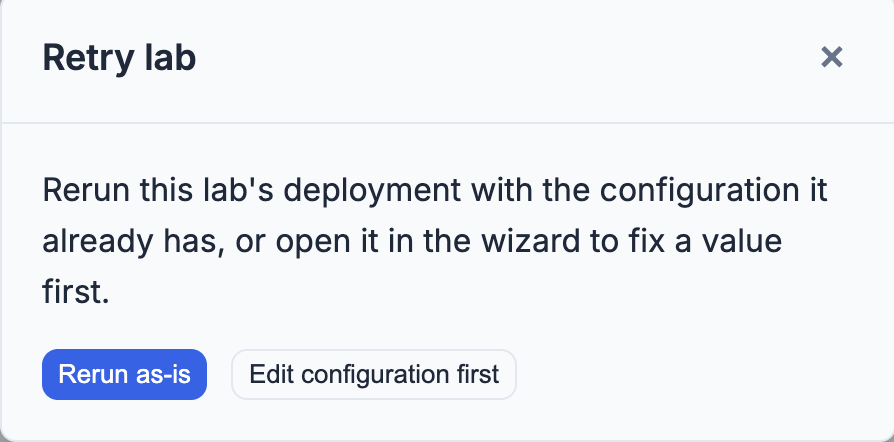
- Rerun as-is — behaves exactly as before: the lab is retried/recreated with the configuration it already has, without opening the wizard. For Recreate, this still prompts for any credentials the lab's templates reference and, if the lab's scheduled deletion date has already passed, a new date.
- Edit configuration first — opens the full lab creation wizard, pre-filled with the lab's current settings (network, compute, DNS/HTTPS, workspace templates, lifecycle), so you can fix a value — a wrong region, an unavailable flavor, a stale domain — before resubmitting.
A few things to know when editing before a retry or recreate:
- Secrets are never pre-filled. Provider API credentials, DNS credentials, and a BYO-Kubernetes kubeconfig are stripped from the lab's stored configuration before it reaches the wizard, the same way they already are everywhere else EasyLab exposes a lab's config. Leaving these fields blank when editing a retry keeps the lab's existing values; leaving them blank when editing a recreate means none — you must re-enter them there, the same as with Rerun as-is.
- The lab name (stack name) cannot be changed when editing before a retry. A retry redeploys the same lab under the same Pulumi stack name, so the field is read-only in that mode. It stays editable when editing before a recreate, since recreating always provisions a new stack.
- Editing before a retry keeps the same lab. Submitting applies your changes to the same failed lab and reruns it — it does not appear as a new entry in the labs list. Editing before a recreate, like Rerun as-is, always creates a new lab entry; the destroyed one stays in the list for history.
- Avoid switching a lab between Create New Infrastructure and Use Existing Cluster when editing before a retry of a lab whose rollback failed, and which therefore still holds real cloud resources — Pulumi would treat the switch as those resources no longer being wanted and destroy them. This is safe to change freely after a successful rollback, and when editing before a recreate, since both start from a fresh stack.
Automatic rollback of a failed deployment
When a deployment fails — on a first creation, a recreate, or a retry — EasyLab immediately destroys whatever that deployment had already created (network, gateway, Kubernetes cluster, node pool, Helm releases, DNS records…), so a failed lab does not leave orphan resources running and billing. There is nothing to enable.
- The lab stays running during the rollback and its output shows the destroy; it turns failed once the rollback is over. Retry and Destroy Stack are only offered from that point.
- After a successful rollback (
✅ Rollback completedin the output) nothing is left of the attempt, so a Retry redeploys the lab from scratch rather than resuming where it failed. The kubeconfig of the removed cluster is no longer offered for download. - On a Use Existing Cluster lab, cert-manager, Traefik, the ClusterIssuer and the DNS-01 setup are left in place, exactly as when destroying such a lab: other labs on the same cluster may rely on them.
- If the rollback itself fails, the lab's error says so (
automatic rollback failed), the stack state is kept, and the kubeconfig stays available when the cluster exists so you can inspect it. Resources may then still exist: fix the cause and Retry, or use Destroy Stack to remove them.
What a rollback cannot remove
A resource whose creation was interrupted before the cloud provider confirmed it is not known to Pulumi, so the rollback cannot delete it. This is rare — Pulumi warns about a pending operation in the output when it happens — and is worth a check in your provider's console.
Templates on a lab
The lab detail page's Workspaces & Templates section shows a Templates on this
lab panel above the workspace list. It lists every template configured on the lab, with its IDE and
image (or devcontainer when the workspace is built from a devcontainer), and a
badge telling you which templates currently have running student workspaces:
- ● N running — N live workspaces were created from that template.
- none — the template is configured but no student has an active workspace from it yet.
Use the Refresh button to update the counts as students start and stop workspaces.
A template that is closed to new students has a dashed border and a Closed to new students badge. Its running count stays as it was, because closing a template leaves its workspaces alone. The panel header counts them too, for example "3 configured, 1 closed".
Attribution applies to workspaces created after this feature shipped. Any workspace that was already running beforehand has no template recorded and is reported as a small "not attributed to a template" note; it is attributed once the workspace is recreated. Because workspaces are cleaned up on their lifetime, this resolves on its own.
Image pre-pull
Each lab keeps its workspace images cached on the cluster's nodes, so a student
never waits for an image download that could have happened earlier. EasyLab runs
one DaemonSet per lab, easylab-prepull-<lab id>, in the workspace namespace.
Its pod pulls every image the lab's templates use (IDE image, sidecars,
git-clone helper, and baked or envbuilder images), then idles on a pause
container. It requests almost no CPU or memory.
- It is created when the lab finishes provisioning, and updated right away when you add a template or a bake succeeds. The background cleanup pass (every 5 minutes) also re-checks it, which covers templates edited any other way and nodes the autoscaler adds.
- If every template sets the same Node Selector, pulls are limited to those nodes. Otherwise every node pulls.
- It uses the templates'
image_pull_secrets, plus the in-cluster registry's credentials when a baked image lives there. - Destroying the lab removes it, including on a bring-your-own cluster.
To check it, run kubectl get ds -n <workspace namespace>. It should show one
ready pod per node.
Pre-baking a devcontainer template
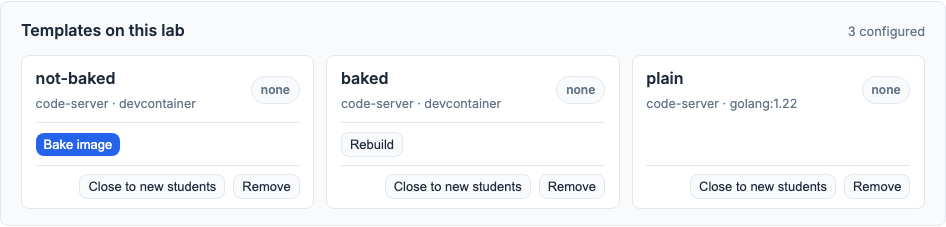
A devcontainer template's card carries a Bake image button (Rebuild once a bake has already succeeded); a plain (non-devcontainer) template shows neither:
Baking builds the devcontainer once, pushes the result as a normal image, and
records it on the lab — every student workspace for that template then does an
ordinary image pull instead of running the build itself.
This skips both the build and the per-pod layer extraction described in
A warm cache skips the build, not the extraction, which is the larger cost even with a warm cache_repo.
The template's git repository is baked into the image too. A student's workspace copies it onto their volume on first start rather than cloning it, so starting a workspace no longer depends on the git host at all. Private repositories included: the bake clones with the template's git credential, and the token never ends up in the image. See Pre-baking: skipping the build entirely.
Clicking the button starts a background build and shows a building badge that updates on its own; it turns into a baked (date) badge once done, or shows the failure if it did not succeed. Building runs as a one-off job in the lab's cluster, entirely separate from any student's workspace — no one waits on it.
Baking automatically
You do not have to click Bake image yourself. Bake devcontainer images automatically is offered in two places:
- When creating a lab — on the wizard's Workspace step. Every devcontainer template of the lab is baked as soon as its cluster is up, so the images are usually ready by the time students arrive. The lab is reported ready without waiting for the bakes: they keep running in the background, and each template's card shows its building badge until its own is done.
- When adding a template — at the bottom of the Add Template drawer, for the template being added. It opens on the lab's own setting.
An automatic bake is the same bake as a click on the button, with the same requirements: a cache registry, and a domain when that registry is hosted in-cluster. One that cannot start, or that fails, does not fail the lab or the template addition — the template's card shows the failed badge and the reason, and Rebuild retries it. Until a bake succeeds, students of that template simply build the devcontainer in their own workspace, as they would with no bake at all.
Automatic bakes appear in the audit log as lab.template_bake with
(automatic) after the template name — attributed to system for a lab's creation,
and to the admin who added the template otherwise.
A failed badge covers two different things, both worth knowing apart: the build
itself can fail (a bad devcontainer.json, an unreachable base image), or the build
can succeed and push fine but the image never becomes pullable — EasyLab confirms
the image is actually fetchable, over the same trusted connection a student's pod
would use, before ever showing baked. The second case almost always means an
in-cluster registry whose TLS certificate hasn't finished issuing (or never will,
if the lab's cert-manager ClusterIssuer doesn't exist) — see the troubleshooting
table in Devcontainer workshops for what to
check. Rebuild retries the whole thing once the underlying issue is fixed.
Baking to the in-cluster registry needs a domain
A template using Host in-cluster for its cache registry can only be baked once the lab has a domain configured. The build itself doesn't need one — the reason is what happens after: a student's workspace pulls the baked image the same way it pulls any other image, which requires a registry the cluster trusts. The in-cluster registry gets that trust from the lab's own domain certificate; without a domain there is nothing to issue one from, and baking is rejected with an explanation. A template with an external cache registry has no such requirement — that registry is already trusted independently of this lab.
A bake does not track the repository
Baking is a point-in-time snapshot of both the devcontainer and the repository's
content: it is not re-triggered automatically when new commits land, including a
devcontainer.json change. Click Rebuild whenever the source changes and you
want students to get the update — until then, new workspaces keep getting the
previously baked content. Workspaces already started are never touched either
way.
Upgrading from a version without repository baking
- A template baked before this version keeps cloning its repository at workspace start until you click Rebuild once.
- The in-cluster registry now requires authentication. EasyLab turns it on — and
restarts the registry, a few seconds' interruption — the next time a bake or a
workspace uses it; there is nothing to configure. A baked workspace created
before that point has no credentials for it: it keeps working, but if its
pod is ever moved to a node that has not cached the image, the pull fails with
401 Unauthorized. Delete and recreate that workspace.
Workspace history
The workspace list sits behind an Active Workspaces / History pair of tabs (each labelled with a live count) — separating the current cluster state from the lab's full activity log keeps either one from crowding out the other. The Refresh button applies to whichever tab you're on and sits with the tabs rather than inside either one.
History records every workspace created and deleted for the lab, newest first — who owned it, which template it came from, and when. Unlike Active Workspaces, this is not a live view of the cluster: a workspace still shows up here after it has been deleted (by a student, by you, by removing its template, or by automatic lifetime cleanup), which is what lets you see who held a workspace once it is gone.
Each entry shows:
- A green + badge for a creation, or a red − badge for a deletion
- The workspace name and owner's email (falls back to the sanitized workspace username for workspaces created before email tracking was added)
- The template it was created from (blank for workspaces created before template attribution was added)
- The date and time of the event
The Active Workspaces tab's Owner column follows the same rule: email when known, the sanitized username otherwise.
The history is stored with the lab and survives a server restart; it is cleared when the lab itself is deleted.
Use Export CSV, above the history list, to download the full history as a
workspace-history-<lab>.csv file — handy for record-keeping or sharing usage
with someone who doesn't have admin access.
Add a template to an existing lab
The Workspaces & Templates section of a completed lab's detail page has an Add Template button that opens a side drawer for appending a workspace template without recreating the lab.
The drawer is the wizard's Workspace Templates step — the same editor, rendered from the same source — so every option available when creating a lab is available here, and the three ways to define a workspace are the same:
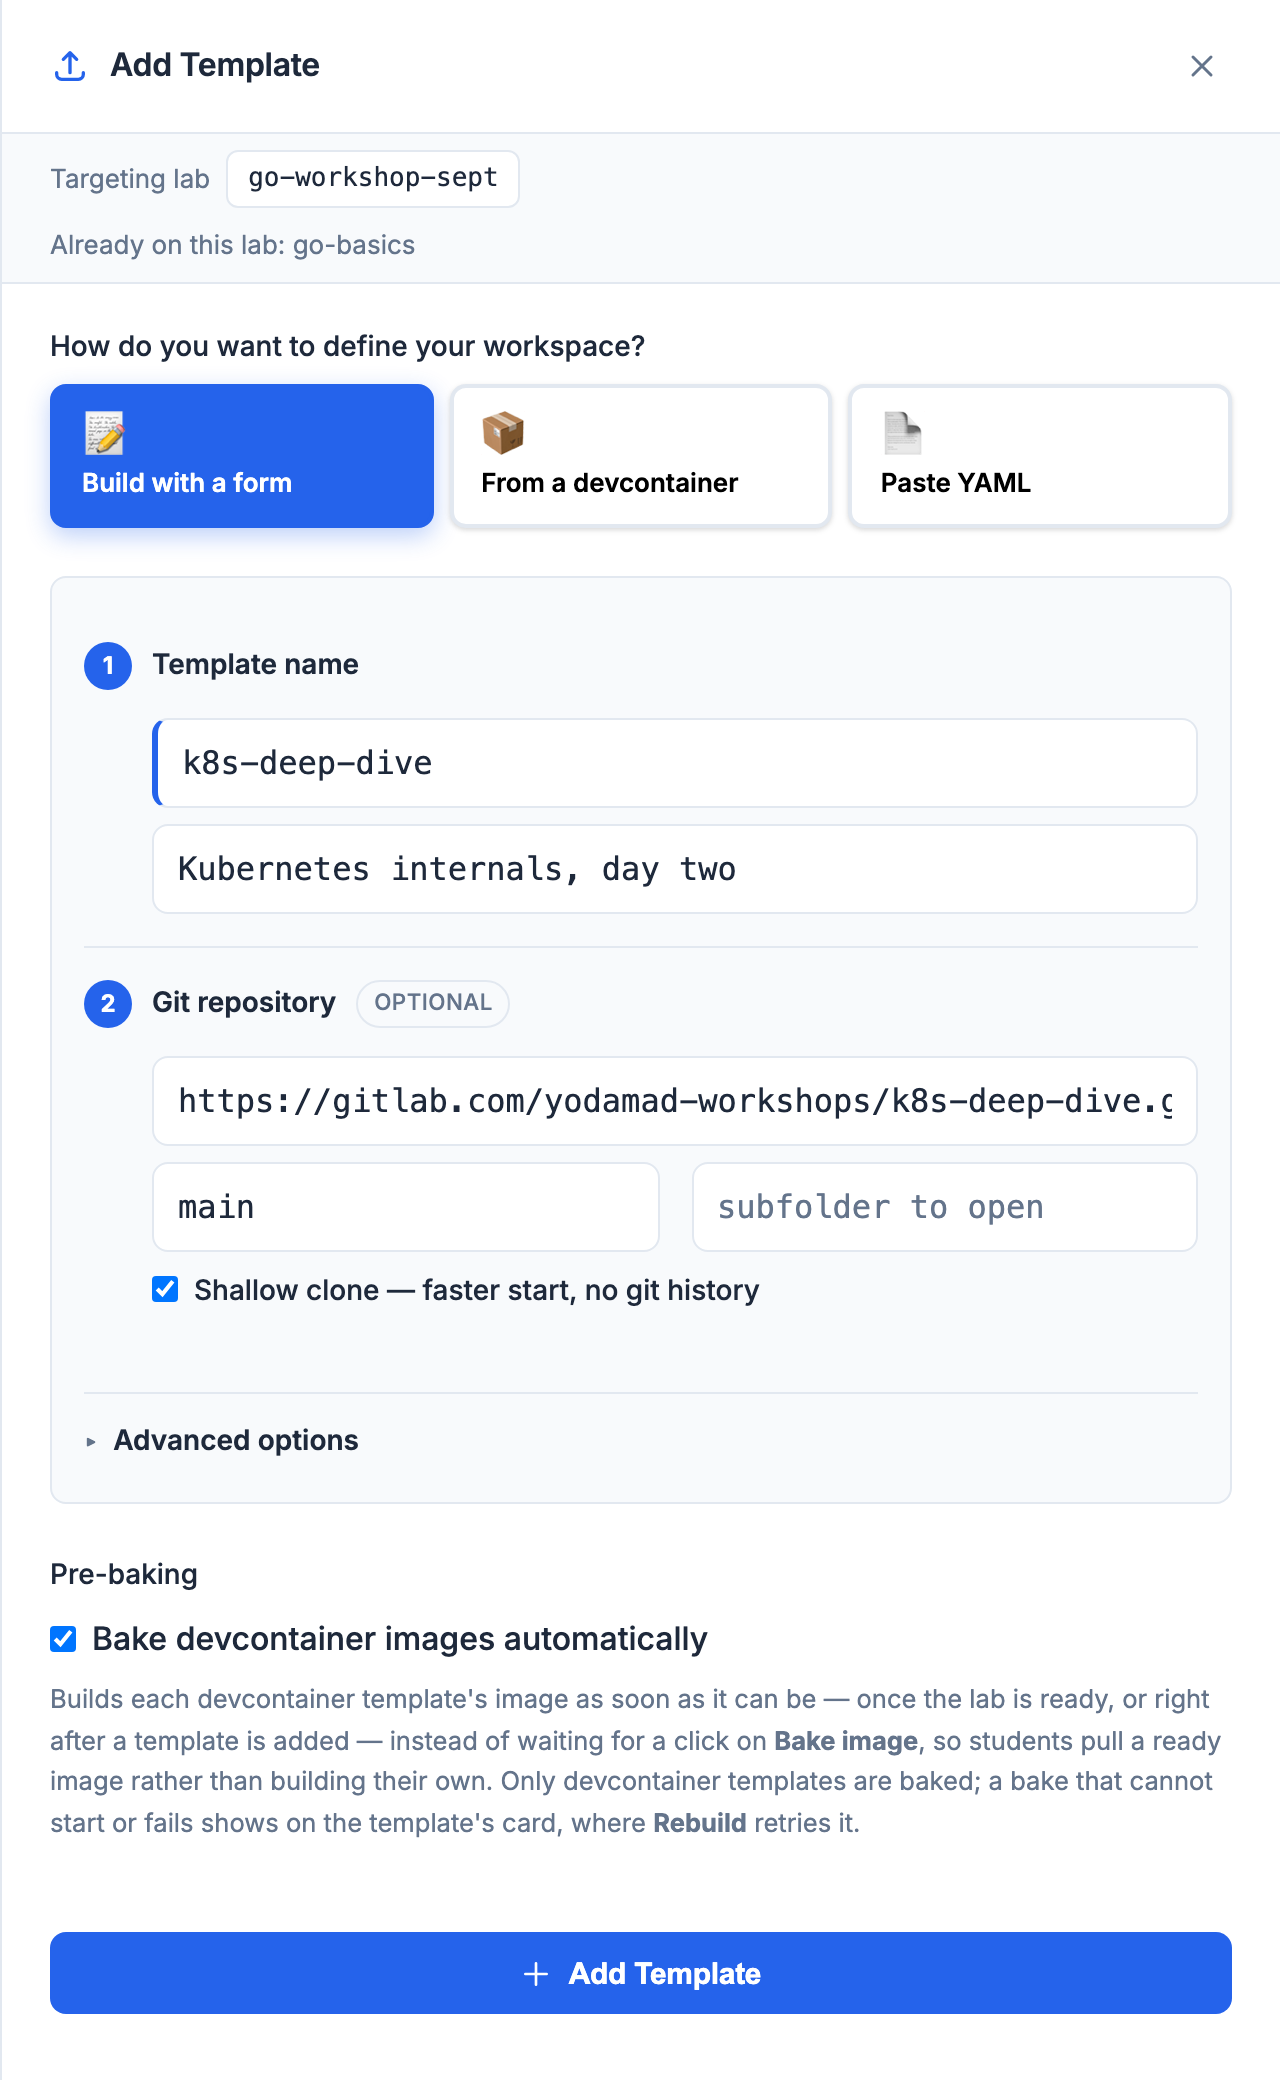
- Build with a form — template name and description, git repository (branch and subfolder), then Advanced options for the git credential, image, CPU/memory/disk with independent limits, startup script, dotfiles, extensions, environment variables, sidecars, mounts, and node selectors.
- From a devcontainer — name and describe the template, then point at a workshop
repository (or upload a
devcontainer.json/ repository.zip). The devcontainer can live in the workshop repository or in a separate, shared config repository; the build cache can be an external registry or one EasyLab hosts in the cluster; and resource overrides sit under Advanced options. EasyLab reads the devcontainer, generates the template YAML, and opens it for review before you add it. The name is required here too, so an import cannot silently reuse the name of a template already on the lab. - Paste YAML — write (or Validate, or Insert skeleton, or Upload file) the template YAML directly. The document may define more than one template, and all are appended.
The drawer's context bar names the lab and lists the templates it already has, so a duplicate name is visible before you submit (a clash is rejected). On success a toast confirms the addition and the list refreshes.
Credentials work the same way as in the wizard, with one difference: the pickers offer the credentials this lab already has (see Lab credentials below). Add one in the Credentials panel just above and it appears in the drawer's pickers straight away — you do not have to recreate the lab to introduce a new token. As in the wizard, a git-credential picker left on Auto uses the lab's git credential when it has exactly one, for both the bake and the students' workspaces; with several, pick one explicitly. When a private repository's credential is picked, EasyLab reads it from the lab's cluster to clone the devcontainer during the import, so there is no token to retype.
At the bottom of the drawer, Bake devcontainer images automatically starts the bake of a devcontainer template as soon as it is added — the toast says so, and the new template's card opens on a building badge. The box opens checked when the lab was created with the option on (see Baking automatically), and can be changed for each addition. It has no effect on a plain (non-devcontainer) template, which has nothing to bake.
Left unchecked, a devcontainer template added here still needs baking before students use it — see Pre-baking a devcontainer template above. The Bake image button appears on the new template's card once it is added.
Close a lab or a template to new students
Closing stops new students from joining without touching anyone's work. Use it when a session is full, when a template is being replaced, or at the end of a workshop while participants finish up.
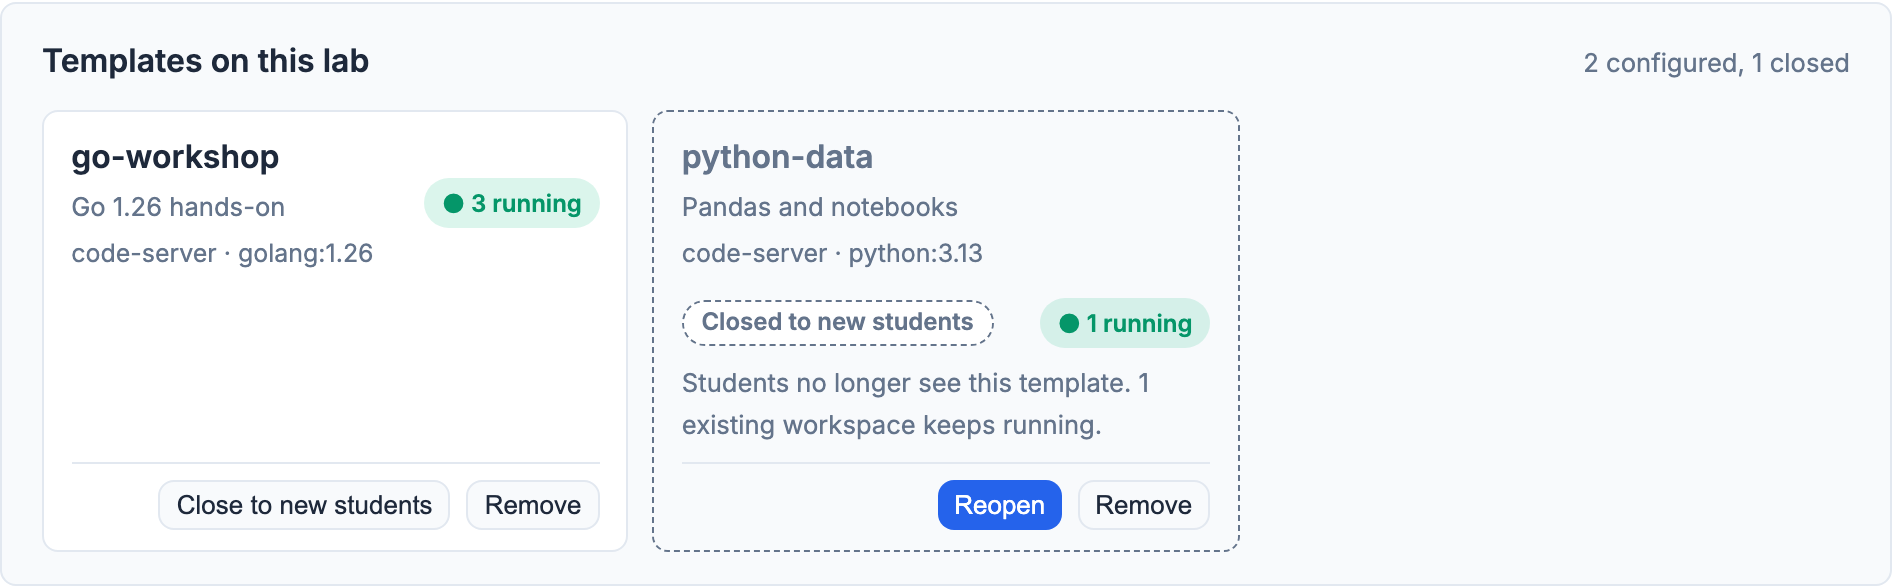
- One template: each card in the Templates on this lab panel has a Close to new students button.
- The whole lab: the strip at the top of the Workspaces & Templates tab has a Close lab to new students button. A closed lab also shows a Closed badge in the page header and in the labs list.
Both take effect immediately, with no confirmation, because nothing is deleted and Reopen (or Reopen lab) undoes it.
What changes for students:
- Students without a workspace there no longer see the closed lab or template in the student portal, and a request for it is refused.
- Students who already have a workspace there keep it. It keeps running, it stays on their My Workspaces page, and the closed lab or template still appears in their picker, marked as closed, so they can get their link and password back at any time.
- A closed lab disappears from the feedback form the same way: only students with a workspace on it can still pick it. Collect feedback before closing the lab if you want it from everyone.
What doesn't change:
- Workspace lifetimes and the lab's deletion date still apply to existing workspaces.
- A closed template stays pre-pulled and keeps its baked image, so reopening it is instant.
- A closed template can still be baked, exported and removed.
- Closing every template of a lab has the same effect for students as closing the lab.
- A lab that is closed when you destroy and recreate it comes back closed.
The audit log records each close and reopen.
Closing is different from removing: removing a template deletes its workspaces.
Remove a template from a lab
Each card in the Templates on this lab panel has a Remove button. Removing a template takes it off the lab, so students can no longer pick it, and deletes every student workspace created from it.
Clicking Remove doesn't delete anything yet. It opens a confirmation inside the card, and the card's border turns red:
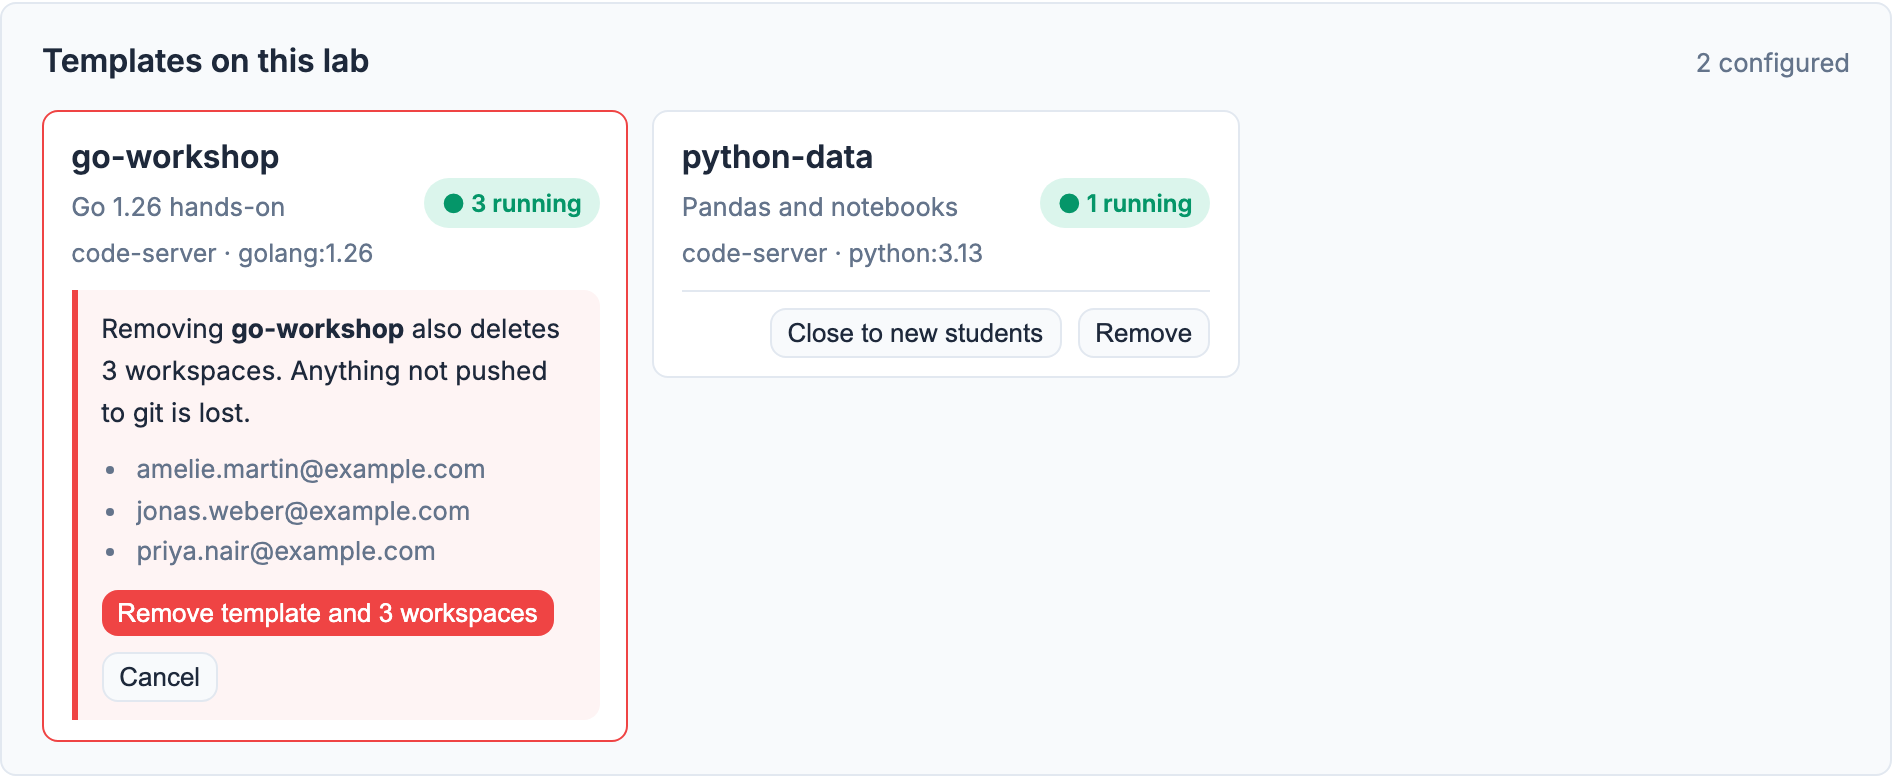
- If students have workspaces from that template, the confirmation lists their owners and the button reads Remove template and N workspaces. Anything a student hasn't pushed to git is lost with their workspace.
- If no one uses the template, the confirmation says so and the button reads Remove template.
- Cancel closes the confirmation without changing anything.
Once it's done, the page reloads on the Workspaces & Templates tab and a toast reports the result. Each deleted workspace appears as a deletion in History, and the audit log records the template removal and the workspace deletions.
A few rules:
- A lab always keeps at least one template. A lab with a single template shows no Remove button. Add a template first if you want to replace it.
- The template is removed even if some workspaces can't be deleted, for example when the cluster is unreachable or a delete fails. The toast then tells you how many were left behind. They still appear under Active Workspaces, reported as not attributed to a template, and you can delete them from there.
- A pre-baked image for the template is forgotten, and the template's images stop being pre-pulled onto the nodes. The image itself stays in its registry.
- Workspaces from before template attribution existed have no template recorded, so removing a template can't identify them and leaves them running. Delete them from Active Workspaces if needed.
Edit a lab's lifecycle
The Lifecycle & Cleanup section of a completed lab's detail page has an inline form for changing the Workspace Lifetime and Lab Deletion date/time set during creation (see Cleaning Configuration above) without recreating the lab — this replaces the old Edit Lifecycle modal:
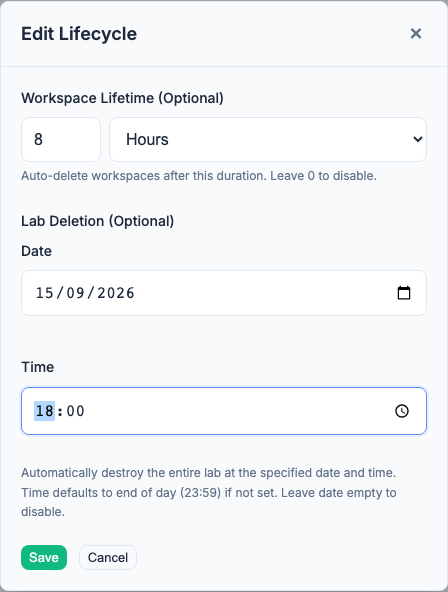
Note: this screenshot still shows the old modal and needs retaking against the inline form described here.
- Change the workspace lifetime value/unit, or clear it (
0or empty) to disable automatic workspace cleanup. - Set, change, or clear the lab's scheduled deletion date and time. A cleared date disables scheduled lab deletion; a date must be in the future.
On save, a toast confirms the update and the page refreshes to show the new values — including the cleanup history table further down this section, which records every automatic sweep that has run. The new policy takes effect on the cleanup service's next check.
Lab credentials (private registries and repositories)
A lab whose workspaces use a private image or clone a private repository needs credentials. Add them at either of two points:
- During creation — the Workspace Templates step of the wizard has a Credentials section at the top. Tokens entered there are held in memory and written to the cluster the moment it finishes provisioning, before the lab reports ready.
- After the lab is up — expand Credentials in the lab detail page's Workspaces & Templates section.
Two kinds:
- Container registry — a server, username and token. Referenced from a
workspace template as
image_pull_secrets, and by a devcontainer template asdevcontainer.registry_auth_secret. - Git repository — a username and token. Referenced from a workspace template
as
git_auth_secret. In the wizard's Build with a form path a single git credential is wired into every template with a private repo automatically; with several, pick the one each template uses under its Advanced options → Git credential. Leave the username blank and it defaults tooauth2, which is what GitLab expects with a personal access token.
The panel shows the exact line to paste into your template, and lists credentials
created out of band with kubectl alongside the ones added here.
How the token is handled, and what follows from it:
- It is written straight to the lab's cluster and not kept by EasyLab. It is never stored in the lab configuration, so it cannot appear in the job file, the jobs API, or the templates export — a template names a credential, it never contains one.
- The Secret lives in the cluster. Entered in the wizard, a token waits in memory only until provisioning finishes; entered on the lab detail page, it is written immediately. Either way EasyLab keeps no copy — which is why a wizard token is lost if the server restarts mid-provisioning, and the lab then shows the credential as pending rather than failing a student first.
- Destroying a lab destroys its credentials. Recreating a lab prompts you to re-enter the tokens, with the names and types carried over; a retried lab keeps them.
- Saving over a name rotates it. Running workspaces keep the old token until they are recreated.
- A referenced-but-missing credential is flagged. If a template names a credential the cluster does not have, the Credentials panel says which one.
Full reference, including the kubectl equivalents and the difference between
image_pull_secrets and devcontainer.registry_auth_secret, is in
Workspace templates.
Workspace access
Each student workspace is a code-server pod exposed (when a domain is
configured) at https://{workspace}.{domain}/. Access is gated by a per-student
password that EasyLab generates and shows to the student on the portal. The
student enters it on code-server's own login page when they open their
workspace, and EasyLab's own student authentication protects the portal itself.
Opening a student's workspace
To check a student's work or help them debug, open their workspace yourself: in the Active Workspaces tab, click the Open Workspace button of the row (next to Delete). The workspace opens in a new tab and EasyLab signs you in, so you land straight in the student's code-server IDE — files, editor and terminal — without needing their password. It works from any browser; nothing has to be installed on your laptop.
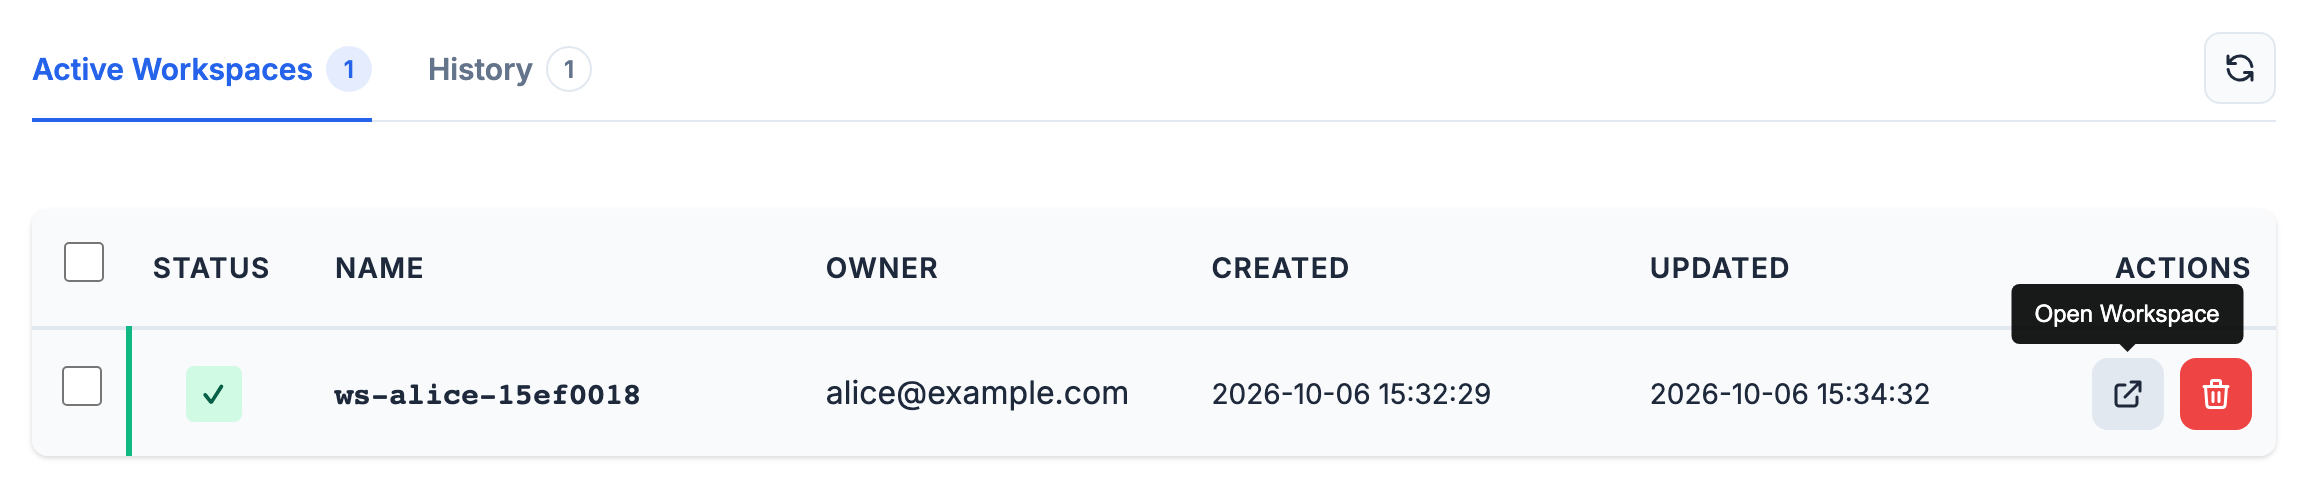
The button only appears once the workspace is up and has a URL; a workspace that is still starting cannot be opened yet.
Things to know:
- You get the same access as the student: anything you edit or run is done in their environment. The student can stay connected at the same time, but code-server does not show each other's cursors.
- The student is told. Their workspace card on My Workspaces shows "A teacher opened this workspace on …" with the date and time of the latest open.
- Each open is recorded in the audit log as
workspace.open, and in the lab's Activity tab.
Certificates repair themselves
A workspace's Ingress used to be written once, at creation, and never revisited.
If the lab's HTTPS settings changed afterwards — a DNS provider was added, so a
shared wildcard certificate replaced the per-host ones, or the ClusterIssuer
was renamed — workspaces created before the change kept pointing at a certificate
nothing issues, and Traefik served its own self-signed default instead. The
browser then warned on every workspace for the rest of the workshop.
EasyLab now reconciles that automatically: each time a workspace is opened or its
status is refreshed, its Ingress' TLS secret, cert-manager.io/cluster-issuer
annotation and ingress class are compared against the lab's current settings and
corrected if they differ. Nothing else is touched — in particular the
workspace's URL never changes, so links already handed to students keep working.
Workspaces served over the nip.io fallback have no certificate source to move
to and are left exactly as they are.
You do not need to recreate or destroy anything: fix the lab's DNS/HTTPS settings, have the students reload their workspace, and the certificate follows. The same reconciliation applies to the in-cluster registry's own Ingress, which is what a devcontainer image pull has to trust.