Creating a Lab
This page walks through the lab creation wizard: choosing infrastructure, defining workspace templates, configuring HTTPS/DNS, and setting cleaning policies. See Managing Labs for retrying, recreating, and everything else you can do once a lab exists.
Create a new lab

Start by naming the lab:
- Lab Name (required) — a unique name used as the prefix for all cloud resources (letters, numbers, hyphens and underscores only).
- Description (optional) — a free-text summary of what the lab is for (e.g. Kubernetes 101 workshop, June 2025 cohort). It is shown in the labs list to help you tell labs apart, and to students on the environment picker when they request a workspace.
First you need to choose how to provide the Kubernetes cluster:
- Create New Infrastructure — Provision a new cluster on a cloud provider (OVHcloud)
- Use Existing Cluster — Provide a kubeconfig for an existing Kubernetes cluster
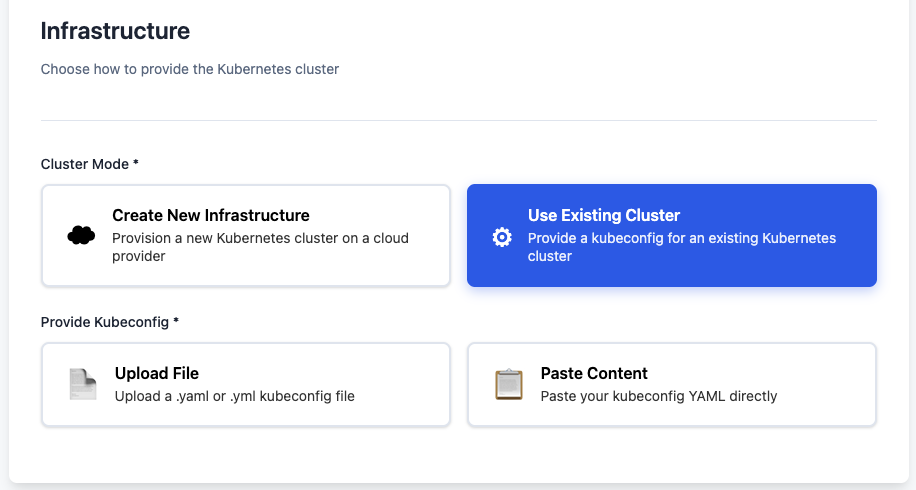
Use Existing Cluster
When you choose Use Existing Cluster, EasyLab skips cloud provider provisioning and uses your own Kubernetes cluster. This is useful when you already have a cluster (e.g. from your organization, a local dev environment, or another cloud provider).
What you need to provide:
- Kubeconfig — Either:
- Upload a
.yamlor.ymlkubeconfig file, or - Paste the kubeconfig YAML content directly
- Upload a
What is skipped:
- No cloud provider credentials required
- No cluster provisioning — EasyLab does not create or manage node pools; it only schedules onto whatever nodes the cluster already has (optionally constrained per template, see below)
- The wizard goes directly to workspace and template configuration
The kubeconfig must have sufficient permissions to create namespaces, Deployments, Services, Ingresses and PersistentVolumeClaims, and (when a domain is set) to install the Traefik ingress controller and cert-manager Helm releases.
The default StorageClass must be network-attached
Every workspace gets a persistent volume, and that volume is only as durable
as the StorageClass behind it. If the cluster's default provisioner is
node-local (local-path, hostPath), a workspace rescheduled onto another
node comes back empty. Check with kubectl get storageclass and, if needed,
set storage_class on the workspace template — see
Persistence.
Splitting EasyLab and workspaces across node pools
If your existing cluster has more than one node pool, you can run the EasyLab server on one and student workspaces on another:
- Label each pool so pods can target it (e.g.
pool=control-planeandpool=workspaces) — how you do this depends on where the cluster runs (for an OVHcloud Managed Kubernetes cluster, set it on the node pool itself; for any cluster you can also label nodes directly withkubectl label nodes <node> pool=workspaces). - Pin the EasyLab server by setting
nodeSelector(andtolerations, if the pool is tainted) in the Helm chart's values — see Helm Chart Deployment. - Pin student workspaces by setting the Node Selector field on each
workspace template (under Advanced options, see above) to match the
workspace pool's label, e.g. key
pool, valueworkspaces.
Workspace pods only support nodeSelector (label matching), not tolerations, so
the workspace pool should be labeled rather than tainted.
On OVHcloud (Create New Infrastructure)
When creating new infrastructure, you choose OVHcloud as the cloud provider. Most of the configuration is preconfigured; the one value you need to supply is the VLAN ID for the private network EasyLab creates — any ID that is free in your OVHcloud project.
Others parameters can be overridden if needed
| Category | Parameter | Description |
|---|---|---|
| Network | ||
| Gateway Name | The name of the network gateway | |
| Gateway Model | The model of the network gateway | |
| Private Network Name | The name of the network private network | |
| VLAN ID | VLAN ID assigned to the private network EasyLab creates | |
| Region | The region of the network | |
| Mask | The mask of the network | |
| Node Pool | ||
| Name | The name of the node pool | |
| Flavor | The flavor of the node pool | |
| Desired Node Count | The desired number of nodes in the node pool | |
| Min Node Count | The minimum number of nodes in the node pool | |
| Max Node Count | The maximum number of nodes in the node pool |
Configure workspaces
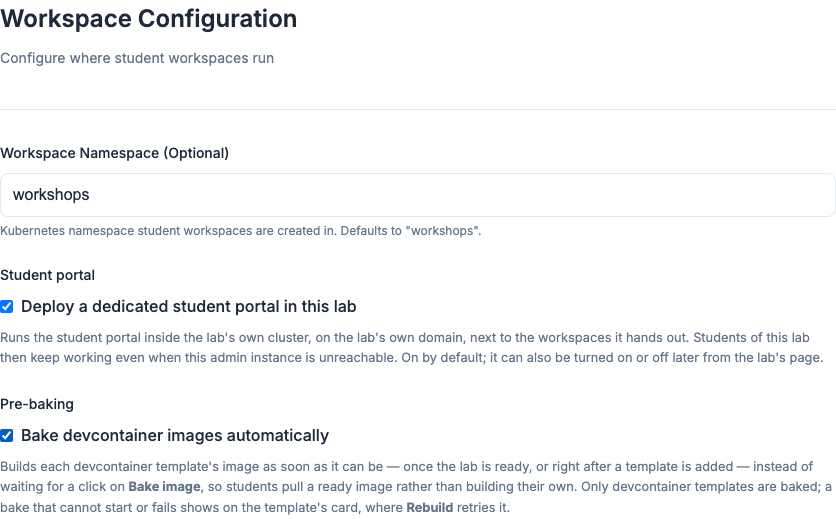
Student workspaces run as code-server pods provisioned directly on the lab's Kubernetes cluster — there is no separate IDE server or database to configure. On the Workspace step you only set:
- Workspace Namespace (optional) — the Kubernetes namespace student
workspaces are created in. Defaults to
workshops. - Deploy a dedicated student portal in this lab — checked by default. Runs the student portal inside the lab's own cluster, on the lab's domain itself, instead of sending this lab's students to the central instance. They can then keep working while the admin instance is unreachable. Uncheck it to keep this lab on the central student space; either way it can be changed later from the lab's page. See In-lab student portal.
- Bake devcontainer images automatically — unchecked by default. See Baking devcontainer images automatically below.
Baking devcontainer images automatically
Bake devcontainer images automatically pre-bakes every devcontainer template of the lab as soon as its cluster is up: each one is built once and pushed as an ordinary image, so students pull a ready image instead of building the devcontainer in their own workspace. It is a setting of the lab rather than of one template, which is why it sits on this step and not on the next. Without it, the same thing is one click per template on the lab's detail page once the lab exists — see Pre-baking a devcontainer template for what a bake does and requires.
- The lab is reported ready without waiting for the bakes. They run in the background, and each template's card on the lab's detail page shows its progress.
- A bake that cannot start (no domain for an in-cluster cache registry, for instance) or that fails never fails the lab: the template's card shows why, and Rebuild retries it.
- The setting is kept on the lab, where it becomes the default of the same checkbox in the Add Template drawer.
- Plain (non-devcontainer) templates are unaffected.
Then, on the Templates step, you define one or more workspace templates for the lab. Each template is a different workspace flavor that students can choose when requesting a workspace.
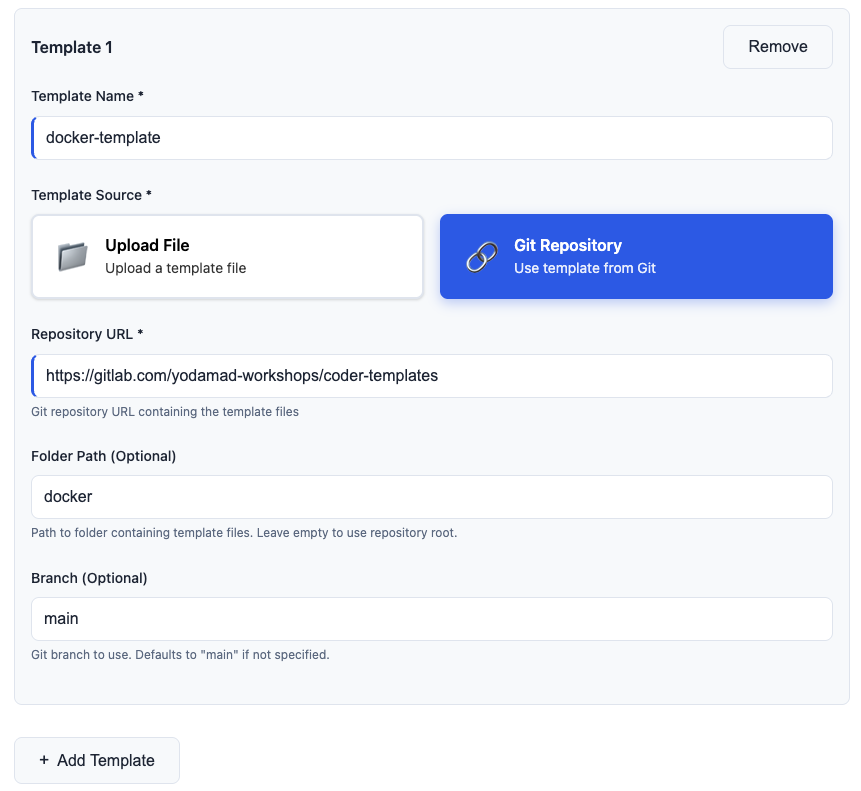
At the top of the step you choose how to define the workspace:
- Build with a form — fill in the fields for each template (the default).
- From a devcontainer — import a workshop repository's
.devcontainer; see Workshops with a devcontainer. - Paste YAML — edit the templates as YAML directly; see Editing templates as YAML.
With Build with a form, each template shows two essentials up front and tucks the rest behind Advanced options, so simple labs stay simple. Use Add Template to define additional templates.
The essentials:
- Template name — Name shown in the student template selector.
- Description (optional) — a free-text summary of what the template provides (e.g. Go 1.26 + Postgres). Shown next to the template name in the lab's Templates panel.
- Git Repository (optional) — a repo cloned into the workspace on first start, into an empty workspace only. The branch field clones a specific branch; subfolder opens a subdirectory of the repo. Tick Shallow clone to clone only the latest commit. The workspace starts faster on a large repo, but the student gets no git history (see Faster first start).
Under Advanced options (all optional):
- Git credential — the credential (from the Credentials section at the top of the step) that unlocks a private Git Repository. Define a single git credential and it is wired into every template with a private repo automatically; add more than one and pick the right one per template here.
- Image — a container image override. Defaults to
codercom/code-server:latest. - CPU / Memory / Disk Size — resource requests for the workspace pod (e.g.
500m,1Gi,5Gi). Disk Size sizes the workspace's persistent volume and defaults to 5Gi. - Storage Class (optional) — the StorageClass backing that volume. Leave it empty to use the cluster's default, which is correct on OVHcloud and Azure; set it on a bring-your-own cluster whose default provisioner is node-local. See Persistence.
- Ephemeral (checkbox) — drop the persistent volume entirely. Student work then lives on the node and is lost whenever the pod is rescheduled, so reserve it for throwaway labs and very large Azure cohorts (see Persistence). It cannot be combined with Disk Size or Storage Class.
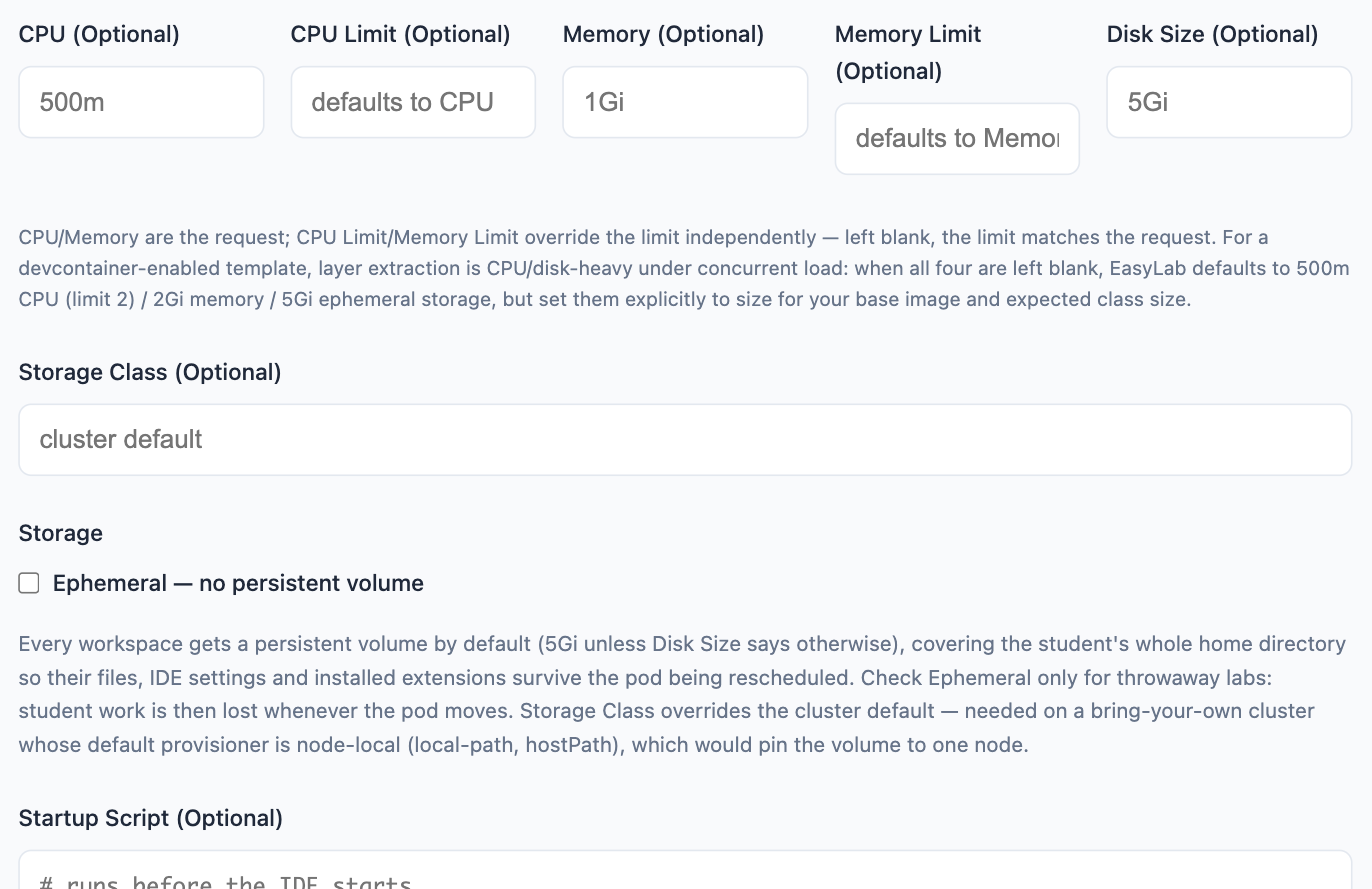
- CPU Limit / Memory Limit (optional) — override the pod's resource limit independently of the request above. Left blank, the limit matches the request, as it always has. See Workshops with a devcontainer for why a devcontainer template in particular benefits from setting these explicitly.
- Startup Script — shell commands run (best-effort) on start, before the IDE opens: install tools, configure the shell, run a bootstrap. Failures are shown in
kubectl logsbut never block the workspace from opening. - Dotfiles Repository — cloned to
~/.dotfiles; itsinstall.sh/setup.sh/bootstrap.shis run if present. - Extensions — comma-separated VS Code extension IDs installed on start.
- Environment Variables — passed to the workspace container.
- Sidecars — extra containers in the workspace pod (name / image / ports / env), reachable from the IDE at
localhost:<port>— e.g. apostgres:16database. Each sidecar can also be marked privileged and given extra capabilities (e.g.SYS_ADMIN) — needed to run docker-in-docker (see below). - Mounts — mount an existing ConfigMap or Secret into the workspace container. The referenced object must already exist in the workspace namespace, or the pod won't start.
- Node Selector (optional) — pin this template's workspace pods to nodes carrying specific labels, e.g. a dedicated
pool: workspacesnode pool. Useful when you want student workspaces scheduled onto different nodes than the EasyLab server itself — see Splitting EasyLab and workspaces across node pools. The field appears only on Use Existing Cluster labs: Create New Infrastructure provisions a single node pool, so there is no second pool to pin anything to.
If no template is defined, a default code-server workspace is used.
Students can request one workspace per template within a lab, so multiple
templates let them get multiple workspaces in the same environment.
A template can also build its workspace from a workshop repository's
devcontainer.json instead of an Image — see
Workshops with a devcontainer.
Editing templates as YAML
At the top of the Templates step, pick Paste YAML to edit the lab's workspace templates directly instead of filling in the form — useful for labs with several templates, for reusing a previous workshop, or for keeping the configuration in a git repository.
workspace_templates:
  - name: go-workshop
    image: codercom/enterprise-base:ubuntu
    git_repo: https://gitlab.com/user/workshop.git
    git_branch: main
    git_folder: exercises
    cpu: "2"
    memory: 4Gi
    disk_size: 10Gi
    startup_script: |
      sudo apt-get update && sudo apt-get install -y jq
    dotfiles_repo: https://github.com/you/dotfiles
    extensions:
      - golang.go
    env:
      DOCKER_HOST: tcp://localhost:2375
    sidecars:
      - name: db
        image: postgres:16
        ports: [5432]
        env:
          POSTGRES_PASSWORD: postgres
        privileged: false
        capabilities: [SYS_ADMIN]
    mounts:
      - type: configmap   # configmap | secret
        name: my-config
        path: /etc/config
  - name: minimal
The keys are exactly the fields described above, and only name is required.
- Switching to Paste YAML seeds the editor from whatever the form currently holds, so you can fill in the easy parts first and then hand-edit. With nothing filled in yet you get a commented skeleton listing every supported key.
- YAML is authoritative. While Paste YAML is selected, the form fields are ignored when the lab is created — switching back to Build with a form does not carry your YAML edits over.
- Validate checks the document without creating anything. Unknown keys are
rejected rather than ignored, so a typo like
imagee:is reported instead of silently dropping the image from the lab. - Insert skeleton replaces the editor with the commented template, and
Upload file loads a
.yamlfile from disk. - Invalid YAML fails the lab creation itself, so a broken document can never produce a half-configured lab.
To reuse the templates from an existing lab, use Export Templates YAML on the
labs list to download its workspace-templates-<stack>.yaml,
then load it with Upload file. Only the templates are exported — credentials
are never included.
See Workspace template examples for complete, copy-pasteable documents: git-backed workshops, database sidecars, docker-in-docker, mounts, and the gotchas each one comes with.
Workshops with a devcontainer
If the workshop repository already ships a .devcontainer/devcontainer.json, a
template can build the workspace from it instead of naming an Image. The
devcontainer is built inside each student's workspace on first start, so the
workshop's own Dockerfile and features work as written.
Choose From a devcontainer at the top of the Templates step:
- Give the workspace a Template name — this is how students see it, and it
must be unique within the lab. It is lowercased with dashes for anything else,
so
Day Twobecomesday-two. The devcontainer's ownnameis only a display string and is often identical across repositories, so importing two of them without naming them yourself would collide. - Optionally add a Description — shown to students when they pick a template. Left blank, the student picker falls back to showing the IDE, resources and repo instead, which is a poor substitute for explaining what the template is for.
- Choose Git repository (EasyLab clones the repo and finds the
devcontainer.json) or Upload (adevcontainer.json, or a repository.zip). - Choose a Cache registry: Host in-cluster, the default, has EasyLab provision the registry itself, in the lab's own cluster — no address or cache credential to fill in. External registry requires a Cache registry address. Either way, if the devcontainer builds from a private base image (or, with an external registry, pushes to a private cache), choose a registry credential from the Credentials section under Registry credential for the build — with a single registry credential it is applied automatically. envbuilder pulls the base image (and pushes the cache) with it, inside each student's pod and in a bake; without it the pull falls back to anonymous and the build fails.
- If the workshop repository is private, add a git token in the Credentials section and choose it under Git credential — with a single git credential it is applied automatically. The same credential reads the devcontainer during import and, baked into the template, clones the repo in each student's workspace.
- Optionally open Advanced options to override CPU / CPU Limit / Memory /
Memory Limit for the built workspace. These override whatever the
devcontainer's
hostRequirementswould otherwise set. Left entirely blank, EasyLab defaults to 500m CPU (limit 2) / 2Gi memory / 5Gi ephemeral storage — layer extraction is CPU- and disk-heavy under concurrent load, so a workshop with many students starting at once should size these explicitly. - Click Import — this step is required. EasyLab turns the devcontainer into a workspace template and lists anything in it that will not take effect. The wizard will not advance to the next step until the import has run, since the import is what generates the workspace the lab is created from.
- Click Review generated YAML to open the result in the editor, adjust it if needed, then finish the wizard.
The import is a starting point, not a black box — what it produces is ordinary template YAML you can change.
This whole step is also available on an existing lab: Add Template on a lab's detail page opens the same editor, with the same options. See Add a template to an existing lab.
The image the devcontainer builds carries no IDE, so code-server is injected
into it. This is independent of the devcontainer's own base image, with one
catch — that base must be glibc-based, since code-server's bundled Node does
not run on Alpine/musl. If the workspace container exits with no such file or
directory, this is why.
A cache registry is required
Devcontainer templates must have a cache registry, one way or the other. Layers are cached there and pushed after the first build, so the first workspace pays for the build and the rest start from the cache. Without one every student rebuilds the whole devcontainer from scratch, which turns a seconds-long start into a minutes-long one for each of them.
Host in-cluster needs nothing further — EasyLab provisions the registry in the lab's own cluster and it disappears when the lab is destroyed. It requires authentication, but EasyLab generates those credentials itself and supplies them wherever the registry is used, so there is no credential to create or choose for the cache. A private base image is a separate matter: it still needs its own registry credential, chosen under Registry credential for the build.
External registry needs the credentials Secret created in the workspace namespace beforehand:
kubectl create secret docker-registry regcred \
  --docker-server=registry.example.com \
  --docker-username=<user> \
  --docker-password=<token> \
  --namespace=workshops
Then choose it under Registry credential for the build (or leave the picker on Auto if it is your only registry credential). A public cache registry with a public base image needs no Secret.
Not every devcontainer can be used
Devcontainers built on docker-compose (dockerComposeFile) are rejected:
the workspace is built as a single image, not a set of orchestrated services.
A hand-written sidecars: block is the nearest equivalent. forwardPorts,
mounts, privileged and postStartCommand are also not applied — the
import lists them so you can decide what to do. See
Devcontainer workshops for the full
breakdown of what is honoured.
Installing system tools
Startup scripts run as the workspace user, which has passwordless sudo, so sudo apt-get install … works. For anything slow or large, bake it into a custom image instead so students don't wait for it on every start, and set that image as the template Image:
FROM codercom/code-server:latest
USER root
RUN apt-get update && apt-get install -y golang nodejs && rm -rf /var/lib/apt/lists/*
USER coder
Build, push to a registry your cluster can pull from, and set Image to it.
Docker inside a workspace (docker-in-docker)
Managed clusters (OVHcloud, AKS) run containerd, not Docker, so there is no host Docker socket to reuse. To give students a working docker, run a Docker-in-Docker sidecar and point the workspace CLI at it:
- Sidecar — name
docker, imagedocker:dind, port2375, envDOCKER_TLS_CERTDIR=(empty, disables TLS), privileged ✅ (dind requires it; capabilitySYS_ADMINalone is not enough for full dind). - Env (on the template) —
DOCKER_HOST=tcp://localhost:2375. - Startup Script — install the CLI (
sudois available in the workspace):
sudo apt-get update && sudo apt-get install -y docker.io
until docker info >/dev/null 2>&1; do sleep 2; done
Each workspace then gets its own isolated Docker daemon. ⚠️ Privileged containers can escalate to the node — only enable this on a trusted workshop cluster you control. For an unprivileged alternative, use docker:dind-rootless with the right capabilities, or install a Sysbox/Kata RuntimeClass on the cluster.
HTTPS Configuration (Optional)
The wizard step asks one question — "How will students reach their workspaces?" — with three choices:
- Quick start — no domain. Workspaces fall back to nip.io
wildcard DNS over the ingress controller's LoadBalancer IP, serving each workspace at
http://{workspace}.{ingressIP}.nip.io. Needs no DNS setup at all, which makes it convenient for quick or throwaway labs, but it is plain HTTP with no TLS. - Custom domain — automatic (recommended) — you own a domain and also configure a DNS provider below. EasyLab creates the DNS records and a single wildcard TLS certificate for you.
- Custom domain — manual DNS — you own a domain but manage DNS yourself. See the warning below before picking this for a large lab.
Picking either custom-domain option reveals:
- Domain Name — the base FQDN for the lab (e.g.
lab.example.com). Each student workspace gets a subdomain ({workspace}.{domain}), served over HTTPS. - Contact email — used only if a Let's Encrypt certificate needs attention; not shown to students.
Manual DNS needs a wildcard record you create yourself
Workspace URLs are {workspace}.{domain}, so nothing resolves without a wildcard
record. With "Custom domain — manual DNS", EasyLab cannot create that record for
you — you must add *.<domain> → <ingressIP> in your DNS zone once the lab is
provisioned. Until you do, workspace URLs return NXDOMAIN and their certificates
stay pending forever, because cert-manager's HTTP-01 self-check fails on the very
same lookup. The wizard shows this same guidance inline as soon as you pick that
option.
If the lab has its own student portal (the default), add a
second record for the domain itself, <domain> → <ingressIP>: the portal is served
there, and a wildcard record does not match it.
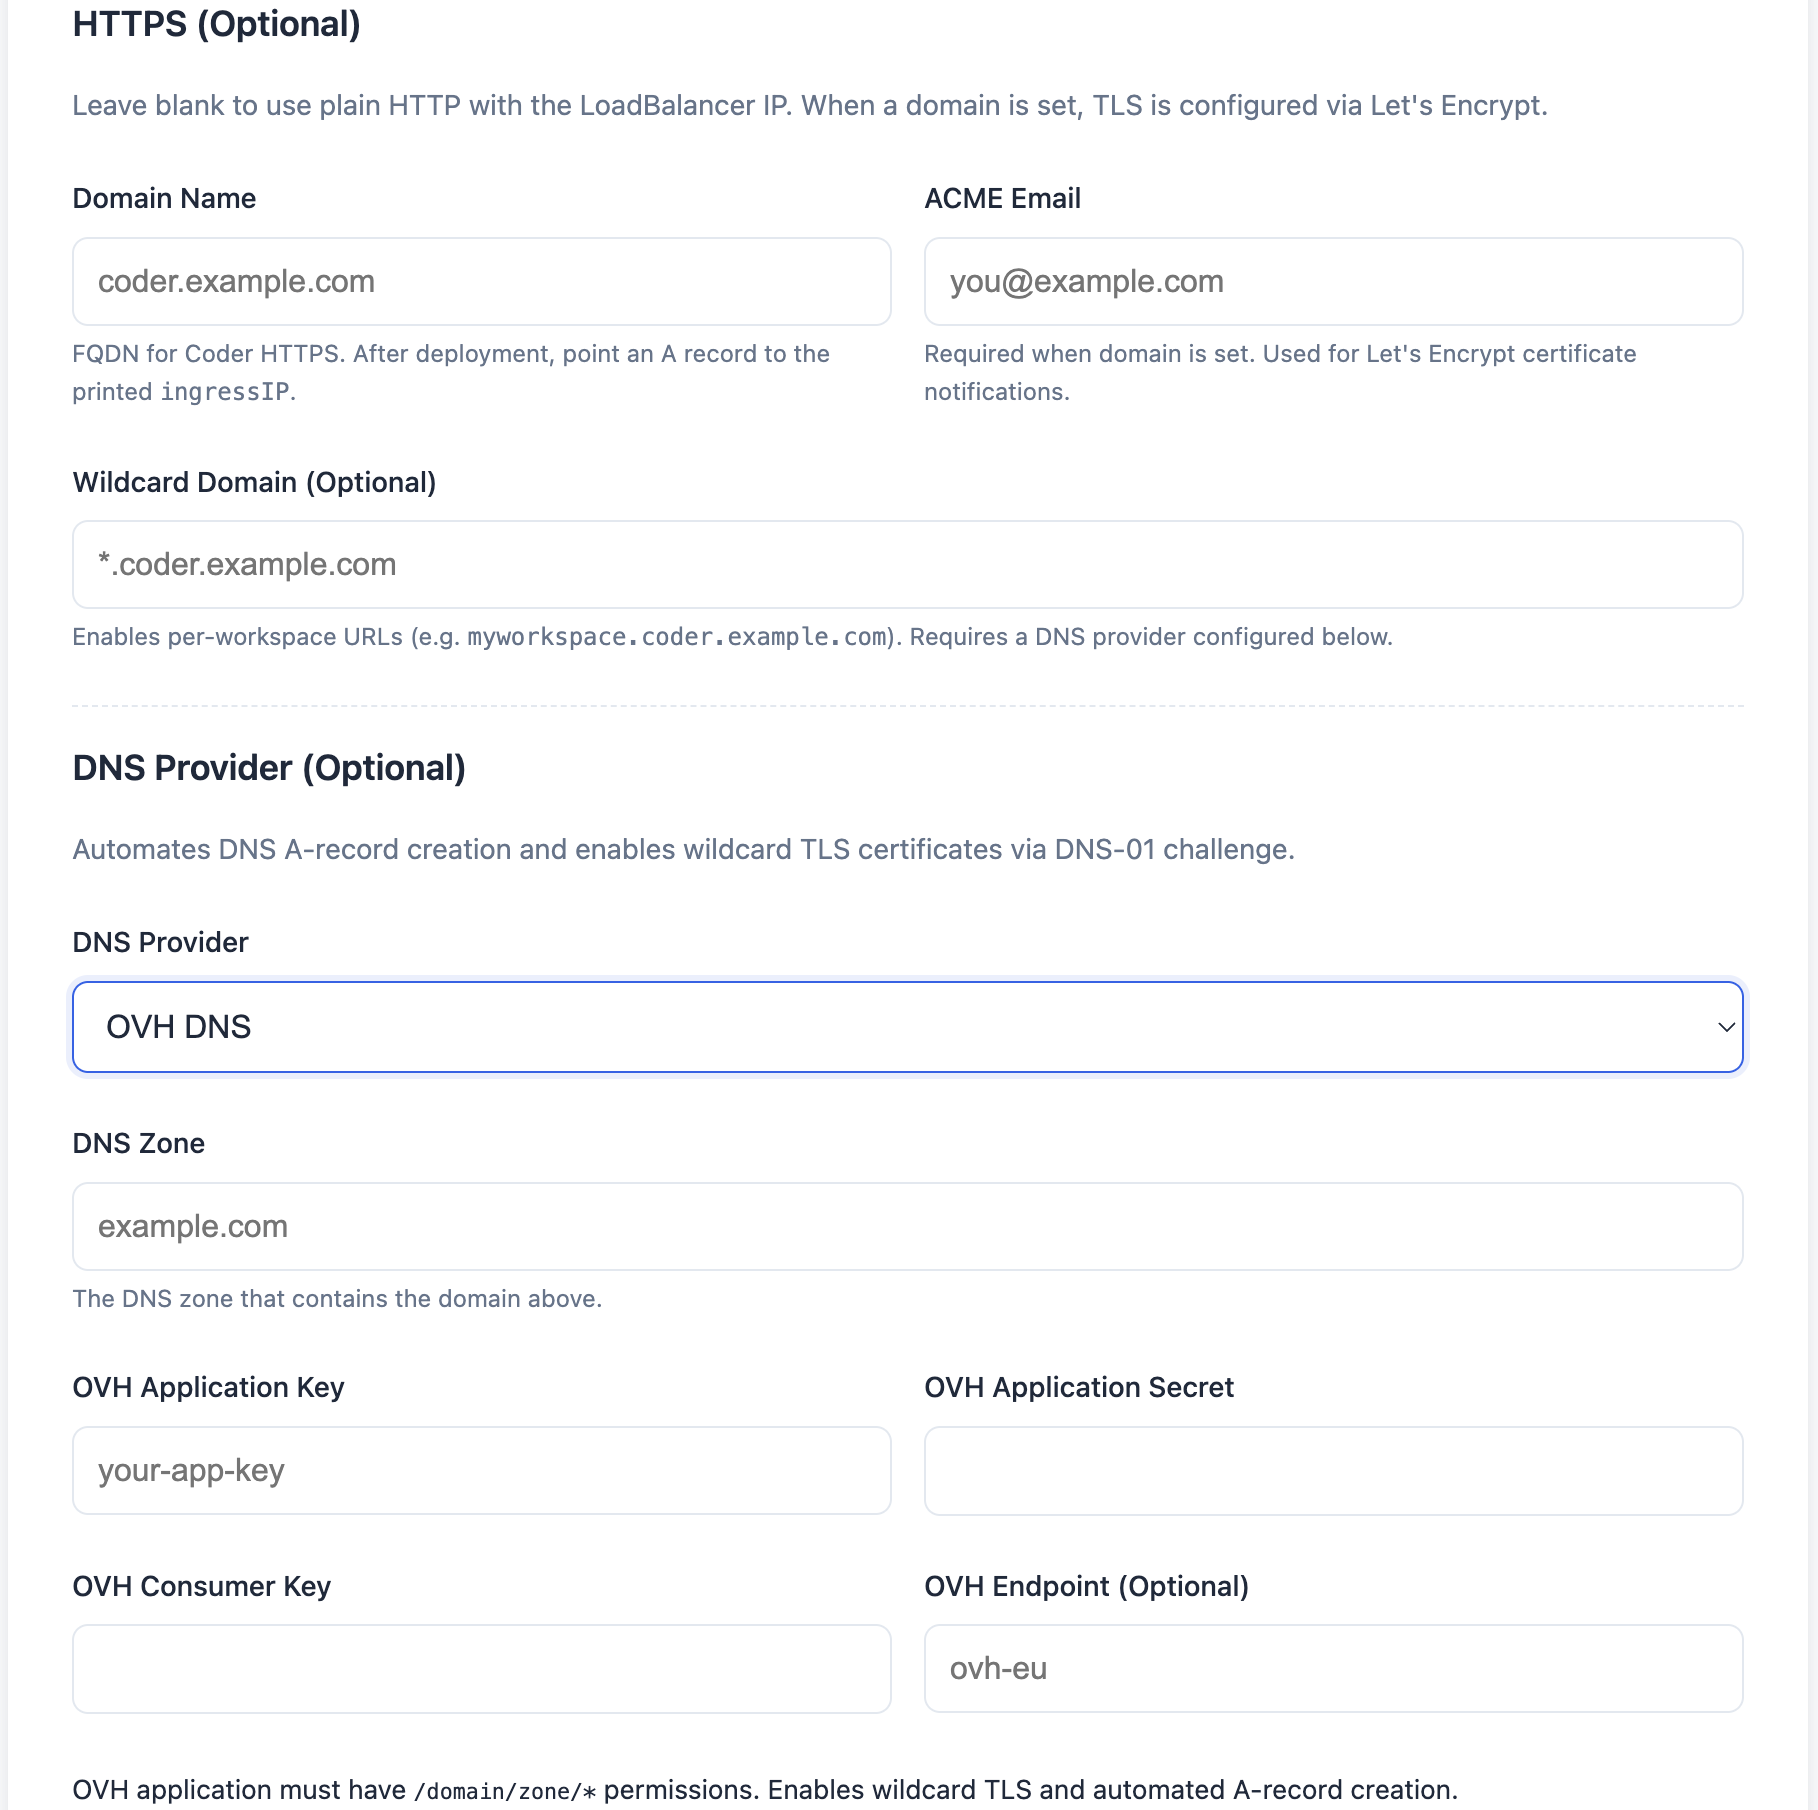
With Custom domain — automatic, the Saved DNS profile dropdown lets you reuse credentials saved on the DNS profiles page instead of typing them again. Picking a profile selects its DNS provider, fills in the DNS zone when the profile has a default one and the field is still empty, and hides the credential fields. Choose Enter credentials manually to type them for this lab only. If the dropdown reports that saved profiles are locked, unlock credential storage first. When you retry or recreate a lab that was created from a profile, the wizard selects that profile again if it still exists.
On Create New Infrastructure, that question and the domain fields under it are all the step asks. EasyLab is building the cluster, so nothing can already be installed on it: there is no ingress controller or cert-manager to reuse, and the single node pool it provisions leaves node selectors with nothing to pin to. Rather than ask, the step states what it will install — Traefik for ingress, and cert-manager for TLS once a domain is set. In Quick start mode there are no certificates to issue, so cert-manager is skipped entirely. On a Use Existing Cluster lab you get those choices instead; see Reusing components already on the cluster below.
An Advanced options section holds the Wildcard Domain override. It only appears for Custom domain — automatic with the Wildcard record DNS strategy (see ExternalDNS below) — that override has no effect in any other mode, so the wizard hides it rather than show a field that silently does nothing.
The following components are deployed into the cluster:
- Traefik — Kubernetes ingress controller (gets its own LoadBalancer IP, exported as
ingressIP). Installed whether or not a domain is set, since the nip.io fallback routes through it too. - cert-manager — automates TLS certificate issuance from Let's Encrypt. Installed only when a domain is set; the nip.io fallback has no certificates to issue.
Changing these settings later also fixes workspaces that already exist
Adding a DNS provider, or correcting a ClusterIssuer name, used to help only
workspaces created afterwards — existing ones kept the certificate configuration
they were born with. They are now reconciled against the lab's current settings
whenever a student opens their workspace, without changing the workspace URL. See
Certificates repair themselves.
Destroying a lab never removes shared Traefik, cert-manager, or DNS-01 infrastructure
Whether triggered manually or by scheduled lab deletion, destroying a lab always leaves its Traefik and cert-manager installations (and their namespaces) in place, even if this lab created them — and the same goes for the DNS-01 plumbing above: the ClusterIssuer, the DNS credential secret, and (for OVH) the solver webhook and its RBAC grant. This matters most on Use Existing Cluster setups, where other labs on the same cluster keep reusing all of it exactly as described above — destroying one lab, including whichever lab originally set DNS-01 up, can never take down ingress, TLS, or certificate issuance for the others. A lab that reuses infrastructure it never installed itself — because Traefik or cert-manager were already on the cluster, or because it runs without a domain — is unaffected by this and destroys normally. On a dedicated Create New Infrastructure cluster this has no visible effect either, since the underlying Kubernetes cluster is destroyed anyway.
The nip.io fallback needs a routable LoadBalancer IP
nip.io resolves an IP embedded in the hostname, so the fallback only applies when the ingress controller has an external IP. On a cluster whose LoadBalancer exposes a hostname instead, or with no ingress controller, workspaces stay cluster-internal and the lab's base URL shows as empty.
After pulumi up completes, the stack output ingressIP is printed. You must create a DNS A record pointing <domain> → <ingressIP> in your DNS provider before the TLS certificate can be issued.
TLS certificates and large labs
Without a DNS provider, each student workspace obtains its own Let's Encrypt certificate for its subdomain. Let's Encrypt limits issuance to about 50 certificates per week per registered domain — and that budget is shared across every subdomain of it, including services unrelated to EasyLab. A large lab (many students × templates) can exceed the limit, and some workspaces then fail to get TLS. Mitigations:
- Configure a DNS provider (below). EasyLab then issues a single wildcard
certificate for
*.<domain>that every workspace shares — one certificate per lab instead of one per workspace. This is the recommended fix. - Keep labs modest, or spread them across more than one domain.
- Use the Let's Encrypt staging issuer while testing (no rate limit; browsers show an untrusted cert).
Opening a workspace
A workspace only shows the Open button once its IDE is actually serving (a readiness probe gates it), so a workspace running a long startup script stays in the "starting" state until setup finishes — avoiding a connection-refused click.
Reusing components already on the cluster
These controls appear on Use Existing Cluster labs only, where your cluster may already be running Traefik or cert-manager and may have more than one node pool.
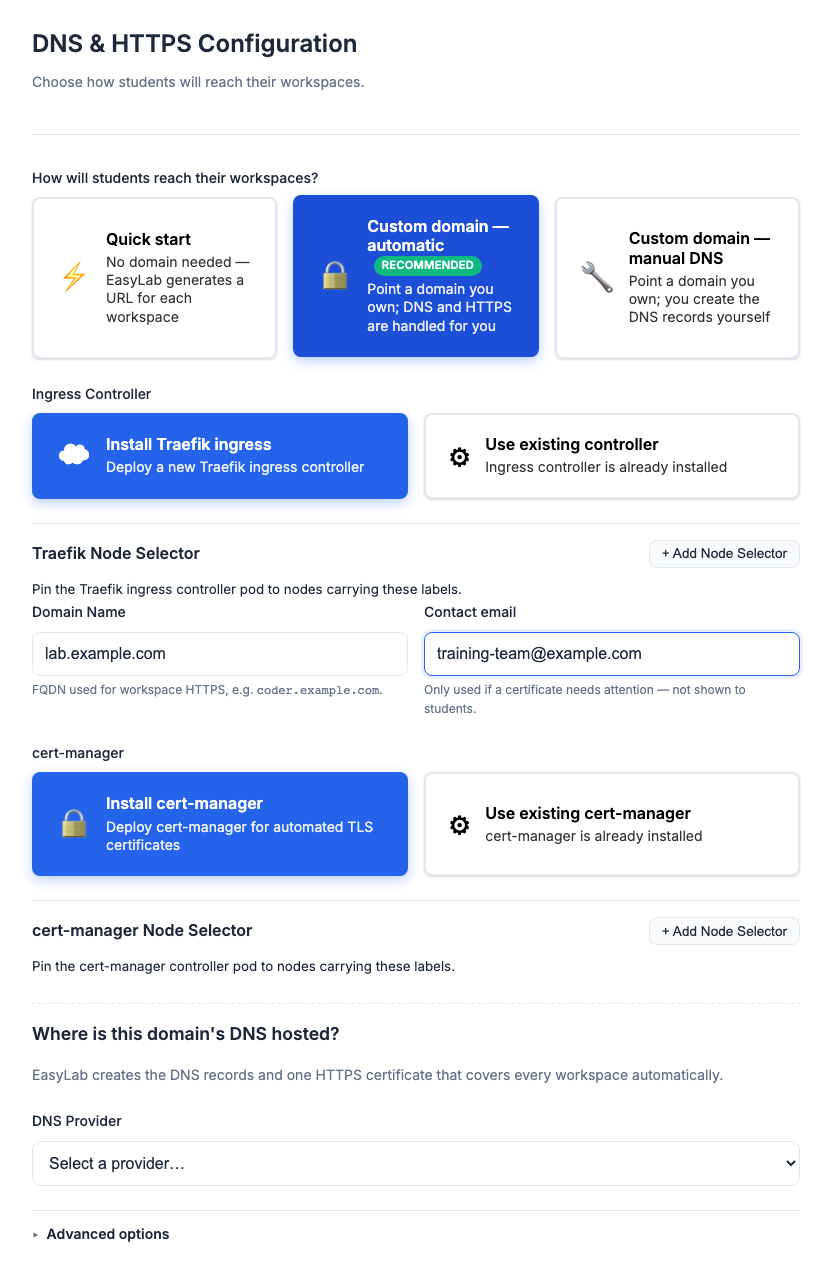
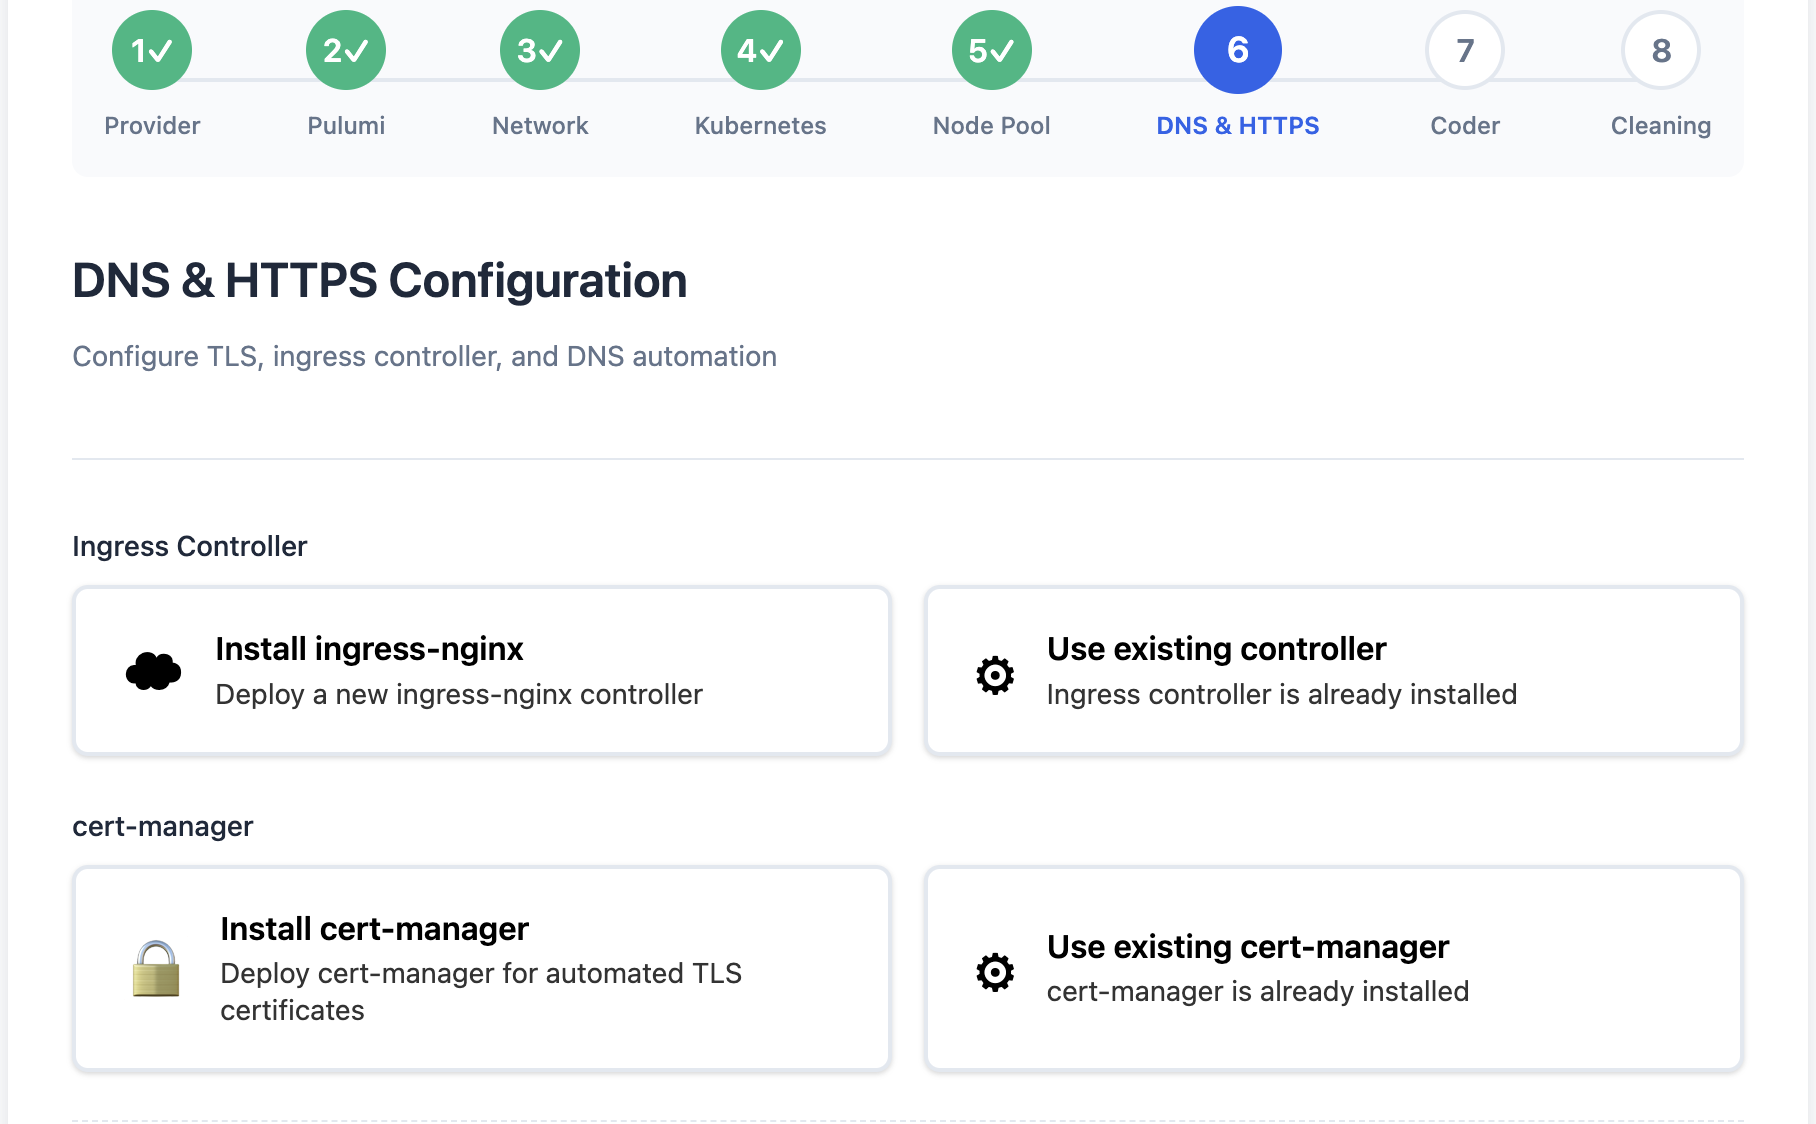
Two infrastructure toggles sit in the main flow, not tucked behind a click, so you can find them even if you're just skimming: Ingress Controller (always shown) and cert-manager (shown once a custom domain is selected — it has nothing to do in Quick start mode). Both default to "install a new one"; switch to "use existing" if your cluster already has one, and a namespace/service-name override appears.
When installing (not reusing) either component, a Node Selector field appears underneath it — Traefik Node Selector and cert-manager Node Selector. Add key/value label pairs to pin that component's pod to nodes carrying those labels, the same mechanism used for workspace template node selectors, applied here to the ingress controller and cert-manager themselves rather than to student workspaces. Useful for keeping shared infrastructure pods off a tainted or GPU-flavored node pool, or for co-locating them with a specific pool for cost or locality reasons.
Reusing cert-manager across labs on the same cluster
Picking Use existing cert-manager together with Custom domain — automatic reveals Is DNS-01 already set up on this cert-manager?. Choose Already configured if an earlier lab on this same cluster already created the ClusterIssuer, DNS-01 webhook, and credential secret — EasyLab then skips recreating them (which would otherwise conflict) and reuses them as-is. You still fill in the DNS provider, zone, and credentials below: this lab still needs its own DNS A-record created, since every lab has its own domain and ingress IP. Leave it on Set it up for me (the default) for the first lab on a cluster, or if you're not sure.
Choosing Already configured also reveals Existing ClusterIssuer Name.
EasyLab requests certificates from a ClusterIssuer named letsencrypt-prod by
default and, on a fresh cert-manager, creates one under that name itself — but
here it is skipping that creation and reusing whatever already exists. If the
existing ClusterIssuer was created under a different name (for example, by a
Helm-based install that names it after its DNS provider), set this field to that
exact name. A mismatch here doesn't fail loudly: cert-manager's
CertificateRequest just stalls waiting for an issuer that doesn't exist, no
certificate is ever issued, and the ingress controller falls back to serving its
own self-signed default certificate instead.
DNS Provider (Optional)
Shown once you pick Custom domain — automatic. Select a DNS provider to automate A-record creation and unlock wildcard certificates (DNS-01 challenge):
| Provider | Setup required |
|---|---|
| OVH DNS | OVH application key, secret, and consumer key with /domain/zone/* permissions |
| Azure DNS | Azure service principal with DNS Zone Contributor role on the DNS zone resource group |
DNS Zone is required
When you select a DNS provider you must fill in the DNS Zone field with the parent zone that hosts your domain — for example, domain ai-bb.yodamad.fr belongs to zone yodamad.fr. The domain must sit inside the zone. Leaving the zone empty (or entering a zone the domain is not part of) is rejected as soon as you submit the form, before any infrastructure is provisioned.
When a DNS provider is configured:
- EasyLab automatically creates the A record
<domain> → <ingressIP>during deployment. - The wildcard A record
*.<domain> → <ingressIP>is created too, so every student workspace subdomain resolves without any manual DNS work. - cert-manager uses DNS-01 (instead of HTTP-01) to prove domain ownership, which supports wildcard certificates.
- A single wildcard certificate for
*.<domain>is issued into the workspace namespace, and every workspace ingress is served from it. No workspace requests a certificate of its own, so the Let's Encrypt weekly limit stops being a concern — and because the certificate already exists, workspaces are reachable over HTTPS as soon as their pod is ready, with no ACME wait.
ExternalDNS (Optional)
Some DNS administrators will not hand out a wildcard record. Once a DNS provider is selected, a DNS record strategy choice appears below the credential fields — Wildcard record (default) or ExternalDNS. Picking ExternalDNS installs ExternalDNS into the cluster instead: it watches the workspace ingresses and creates one DNS record per workspace, removing each one when its workspace goes away.
Both supported DNS providers work with it — Azure DNS at ExternalDNS's Stable support
tier, OVHcloud at Beta. It reuses the same credentials you entered above, so there is
nothing extra to configure. Note that OVH needs the POST /domain/zone/*/refresh right
in addition to the /domain/zone/* record rights.
Trade-offs versus the wildcard record:
- Records appear roughly a minute after a workspace starts (ExternalDNS's sync interval, plus DNS TTL) rather than resolving instantly. The student portal already accounts for this — it withholds the Open button until the hostname actually resolves, so nobody clicks too early.
- It adds a component to the cluster and holds a copy of the DNS credentials in its own namespace.
The wildcard certificate is unaffected either way: it is issued through DNS-01 TXT records written by cert-manager, independently of what creates the A records.
OVH DNS credentials
The OVH credentials for DNS management may differ from your cloud project credentials. Create a separate OVH application at https://www.ovh.com/auth/api/createApp with access to the /domain/zone/* endpoints.
Azure DNS credentials
Create a service principal (az ad sp create-for-rbac) and assign it the DNS Zone Contributor role on the resource group that contains your Azure DNS zone. Azure DNS uses cert-manager's native solver — no additional webhook is required. If you also enable ExternalDNS, the same service principal needs Reader on that resource group on top of DNS Zone Contributor.
Fill in all five fields (tenant ID, subscription ID, resource group, client ID, client secret): EasyLab authenticates to Azure DNS with that service principal, and the server has no Azure CLI to fall back on. This also means the DNS zone can live in a different subscription than the lab cluster.
Environment Variables
Each workspace template can define environment variables passed to the workspace container.
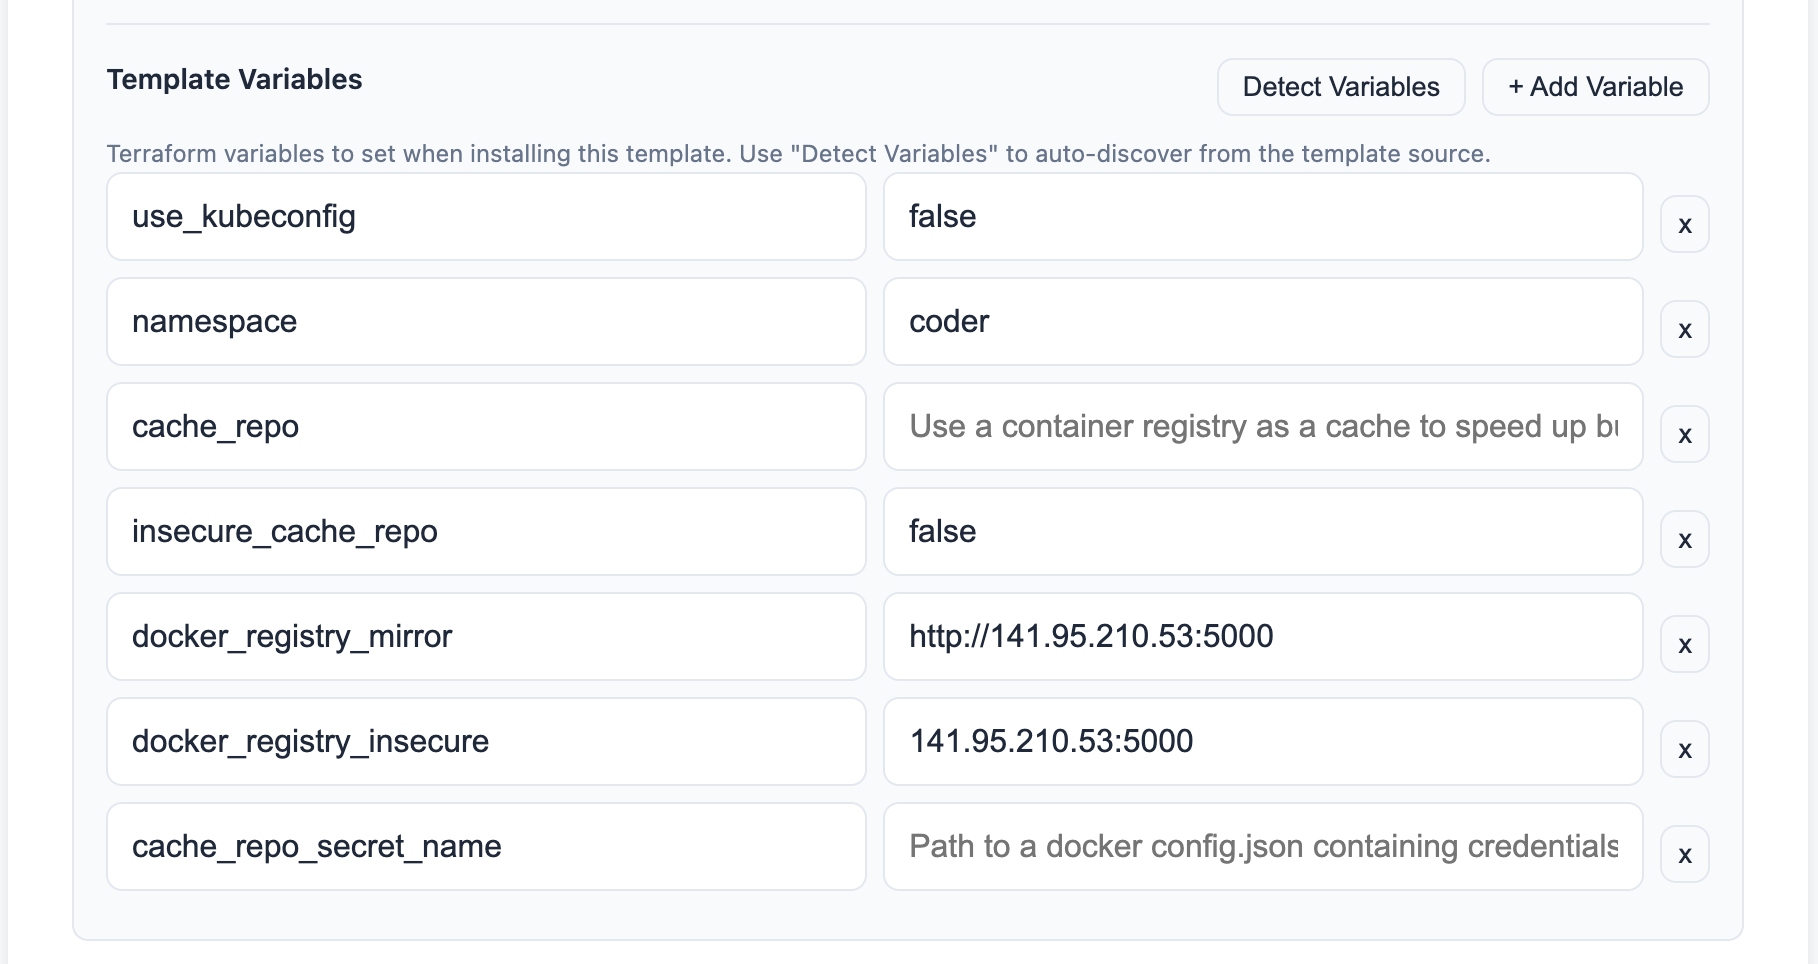
Manual entry — Click + Add Variable on a template row to add an environment variable name and value.
Cleaning Configuration (Step 7)
The last step of the wizard lets you configure automatic cleanup policies for both workspaces and the entire lab.
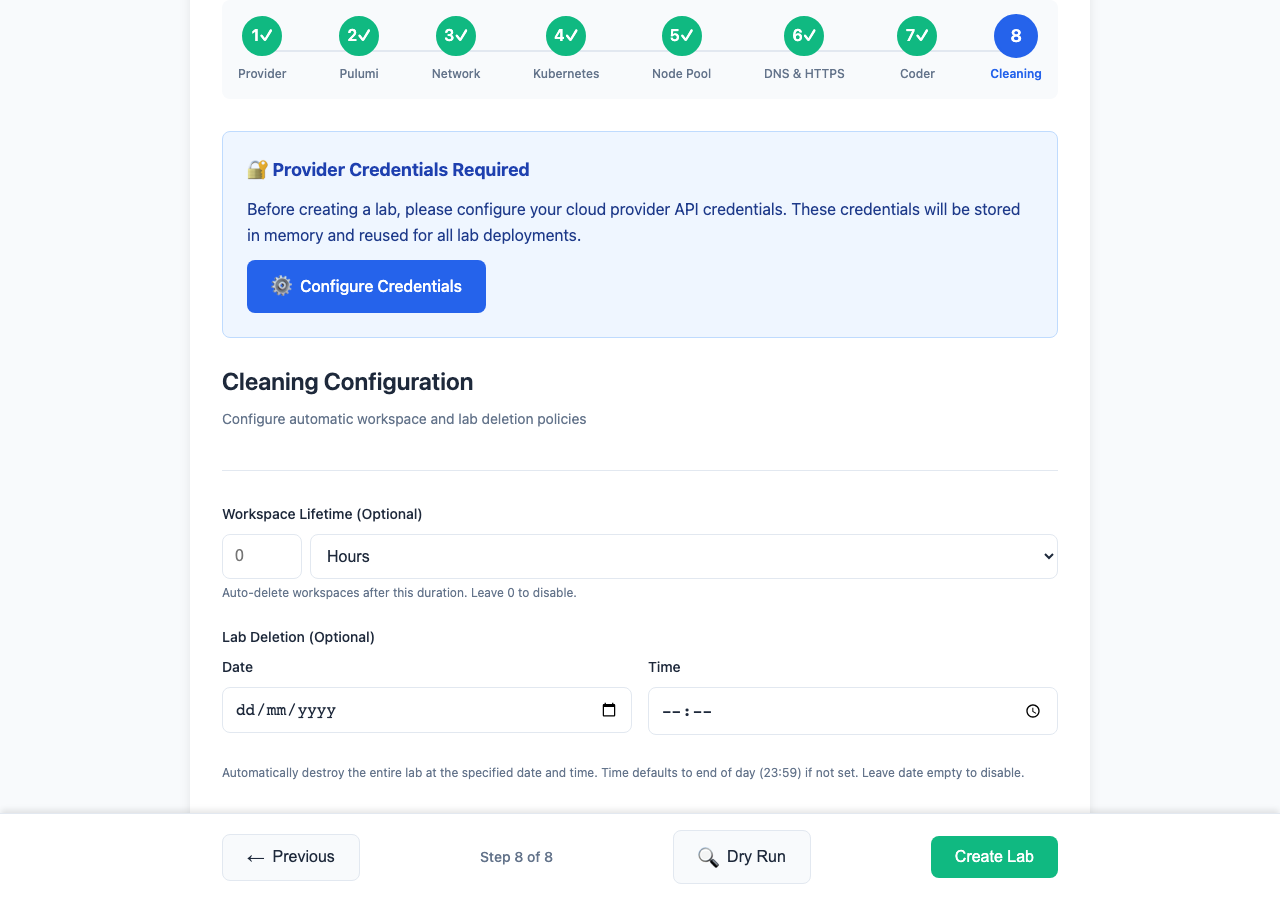
Workspace Lifetime
Set Workspace Lifetime (with a unit of Hours or Days) to automatically delete student workspaces after a given duration. The cleanup service checks at a regular interval (default 5 minutes, configurable via CLEANUP_INTERVAL_MINUTES) and deletes any workspace whose creation time exceeds the limit.
Leave the field at 0 or leave it empty to disable automatic workspace cleanup.
Lab Deletion
Set a Date (and optionally a Time) for the entire lab to be automatically destroyed. When the scheduled date/time is reached, EasyLab runs pulumi destroy on the lab without any manual action.
- If only a date is set, the lab is destroyed at 23:59 that day.
- Leave the date empty to disable scheduled lab deletion.
- Like a manual destroy, this never removes the lab's Traefik or cert-manager installation — see the note above on why.
Note
The cleanup service also runs scheduled lab deletion checks at the same interval as workspace cleanup. Set CLEANUP_INTERVAL_MINUTES to a lower value if you need finer-grained precision (default is 5 minutes).
Recreating a lab that had a deletion date
When you Recreate a lab whose scheduled deletion date has already passed, EasyLab prompts you for a new deletion date before recreating. This prevents the recreated lab from being destroyed immediately by the cleanup service. Enter a future date, or leave it blank to keep the recreated lab running with no scheduled deletion.
Deployment progress
After you click Create Lab, the wizard is replaced by the deployment progress panel, which shows the job status and the Pulumi output and refreshes every 10 seconds.
- When the lab reaches completed, a Go to Lab Administration button appears next to the status badge. It opens the lab detail page, where you manage workspaces, credentials, and lifecycle (see Lab management).
- If kubeconfig is available, a Download Kubeconfig button is also shown.
- If the deployment fails, EasyLab first rolls back whatever the deployment had already created, so a failed lab does not leave cloud resources running. The lab stays running while the rollback is in progress — you can follow it in the output — and only then turns failed, with a Retry Job button. See Automatic rollback of a failed deployment.
Dry run (preview before create)
Before creating a lab, you can run a dry run to preview what Pulumi would do without actually provisioning resources. This is useful to validate configuration and catch errors early.
- Complete the lab creation wizard up to the final step.
- Click Dry Run instead of Create Lab. EasyLab runs
pulumi previewand shows the planned changes. - If the dry run succeeds, the job appears in the labs list with status dry-run-completed (🔍).
- From the labs list, you can then Create Lab on that job to perform the real deployment with the same configuration.
Dry-run jobs do not create any cloud or Kubernetes resources; only real runs do.